|
|


|
for DAZ Studio 4
Just $20.00

Scroll down to preview and/or download our complimentary 6-page excerpt from this tutorial.
 Promo1 | 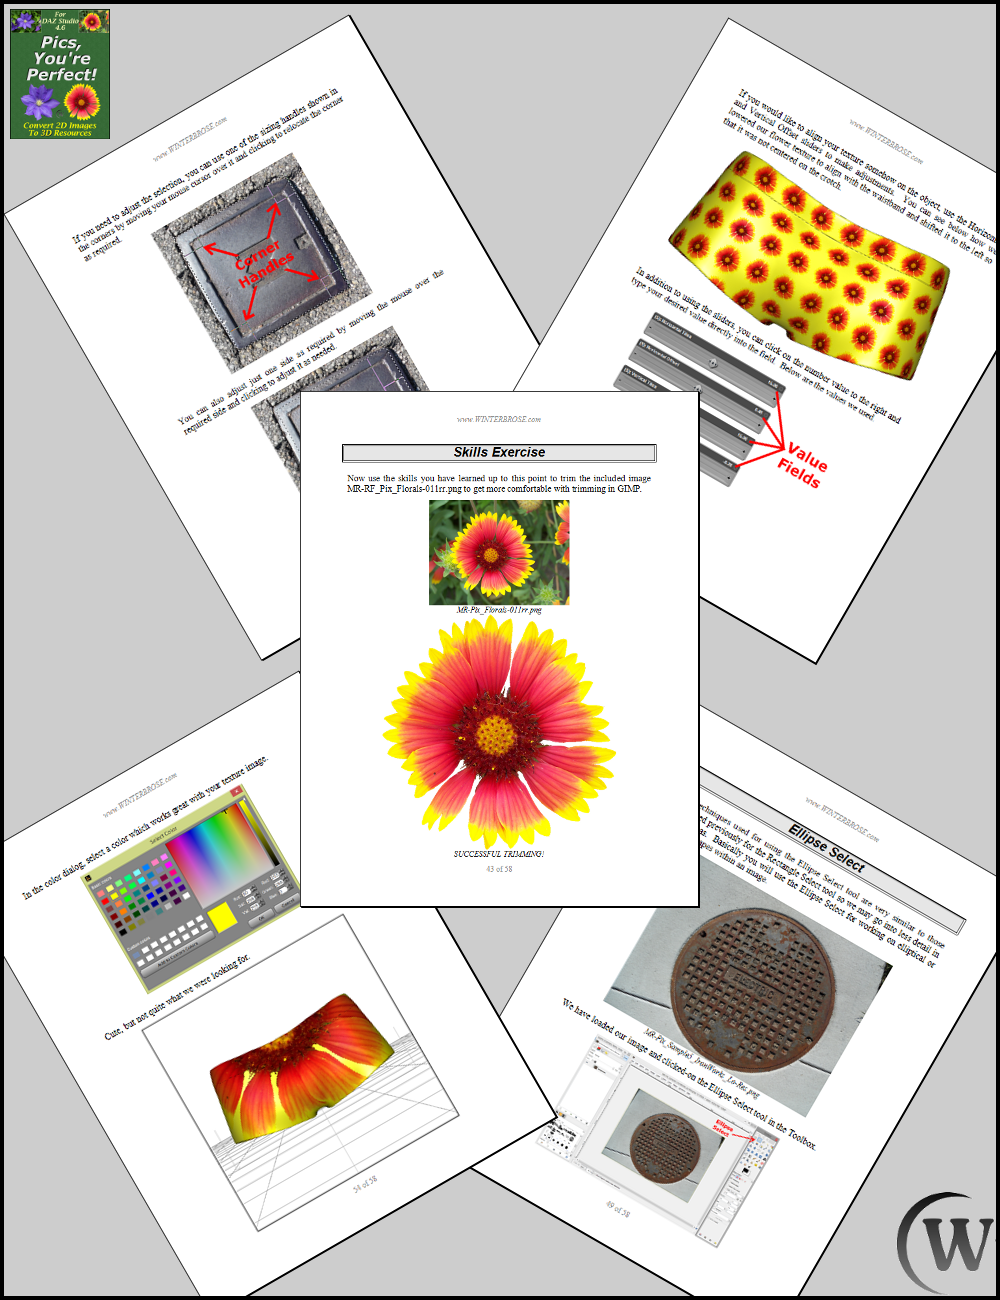 Promo2 | 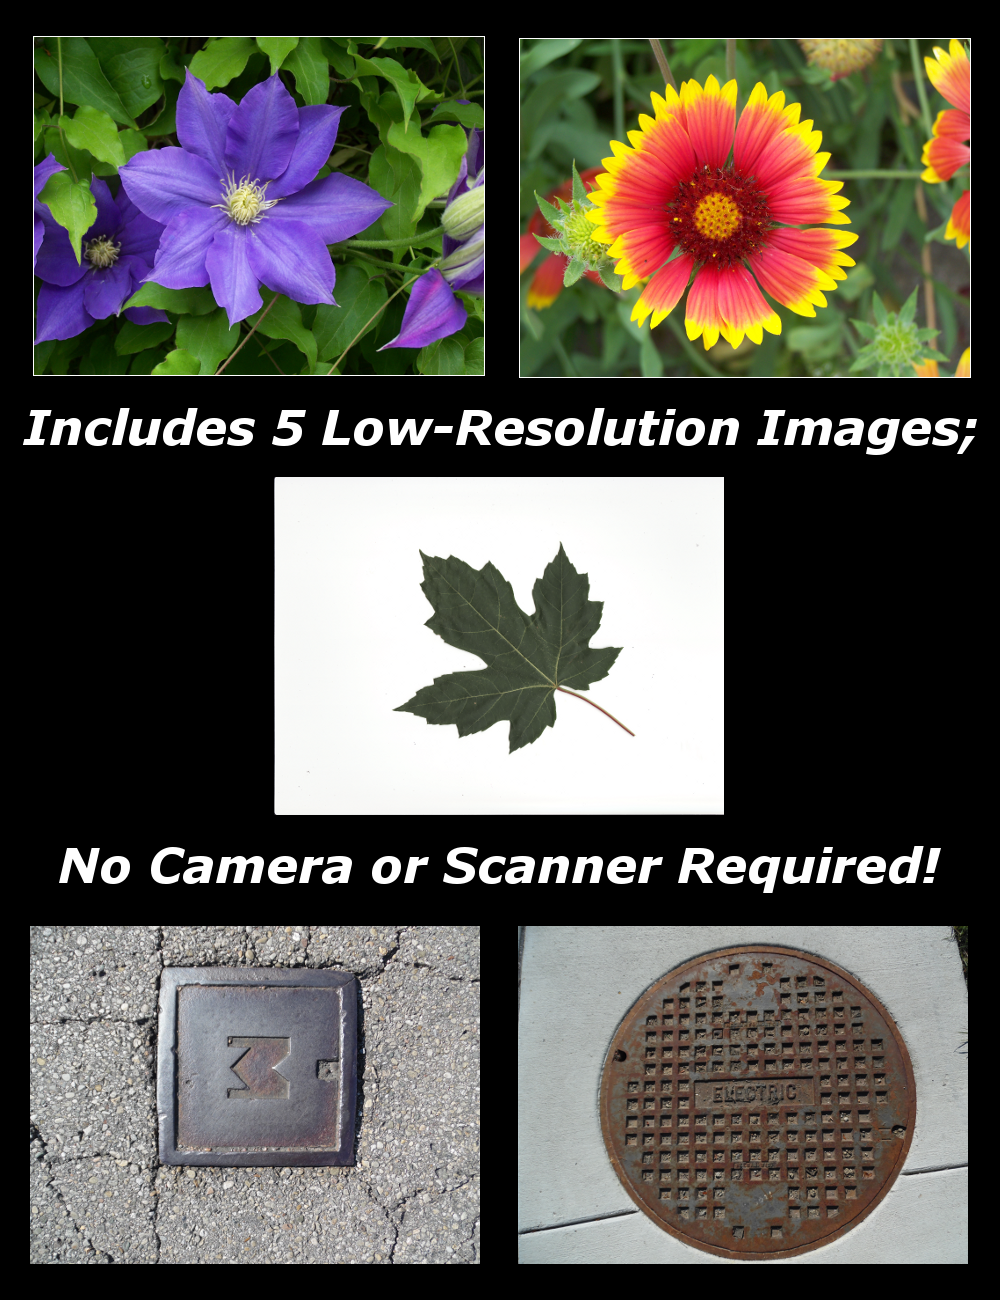 Promo3 |
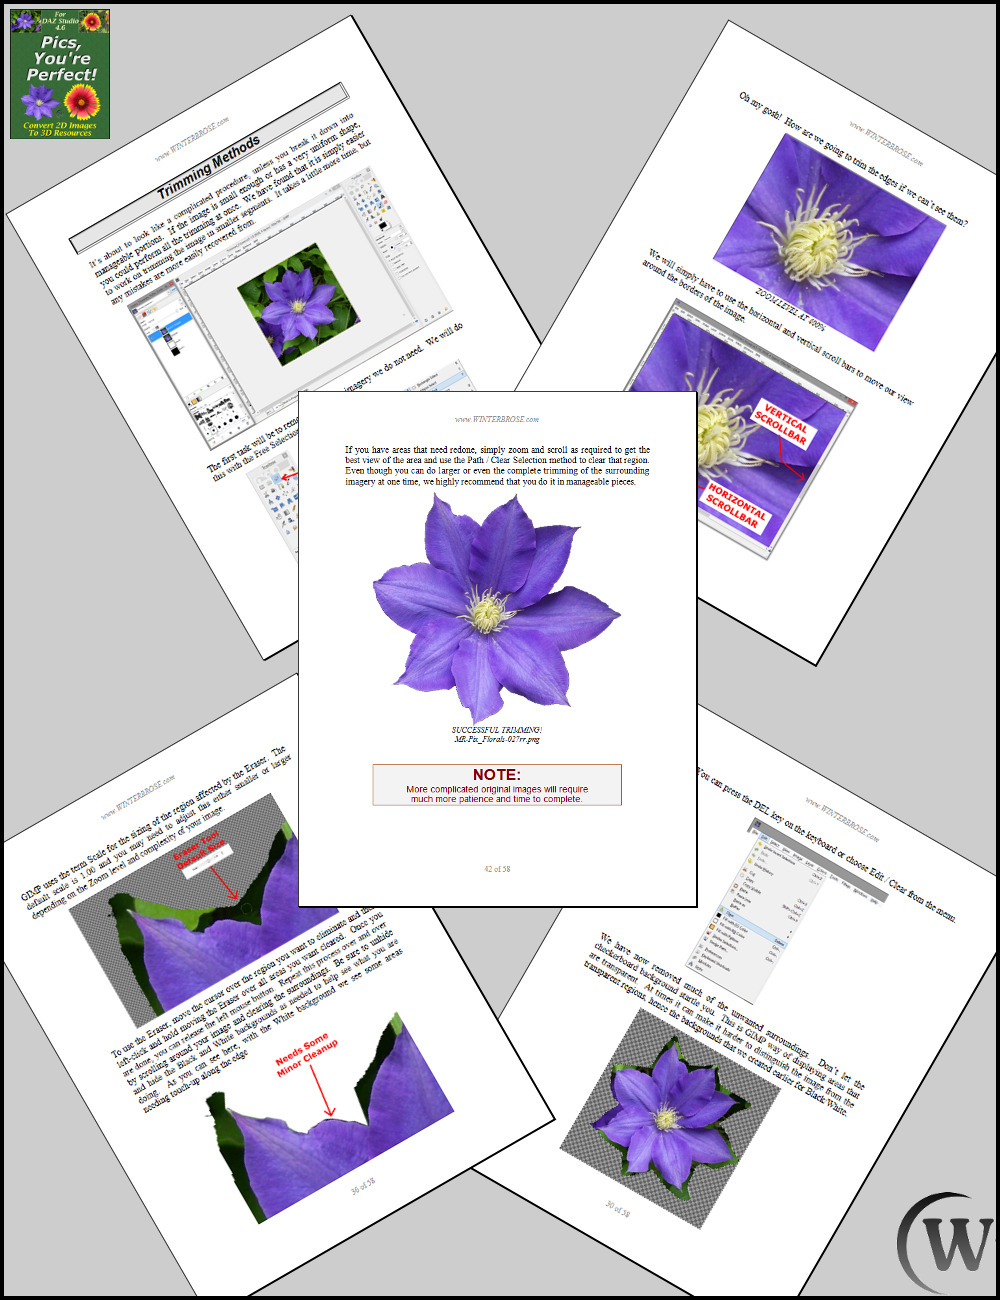
| The purpose of this tutorial is to demonstrate how to use digital images that you feel are picture perfect as your own resources within Daz Studio for your projects. We know the title is “Pics, You’re Perfect!”, but we like to pronounce it as “picture perfect”. Most, but not all, of the digital images you will deal with are from the new age of high resolution digital photos that can be taken with a camera or smart phone. We will demonstrate how to use these images to create new textures with transparency and use these directly within DAZ Studio. We will also demonstrate the benefits of using scanned images of items that are the right shape and size to be scanned with digital flatbed scanners. This tutorial includes 5 free reduced resolution versions of images from the MR-Pix RF Resource Image Packs that have been used for each demonstration. You will not need any digital images to get started. To download the free support files, click here. |
{Click Image Above for Full-size Version }
| * Tutorial Overview: - 58 Pages Fully Illustrated - Popular PDF Format - Step-by-Step Instructions - Prepared with DAZ Studio 4.6 * DAZ Studio Setup - Window Layout & Style - Viewport Settings * Image Formats - JPG vs. PNG - Resolutions * More Selection Techniques - Rectangle Select - Ellipse Select | * Digital Photos - Load Images - Adjusting Canvas - Cropping Image - Prepping Image - Saving Layer Image Files - Trimming Methods * Skills Exercise _ Test and Hone Your Skills * Digital Scans - Common Problems * Using Your Creations - Tiling Textures onto 3D Objects |