|
|
      |
The Beginner's Guide to
Copyright (c) 2014-2021, Winterbrose Arts & Graphics. All Rights Reserved.
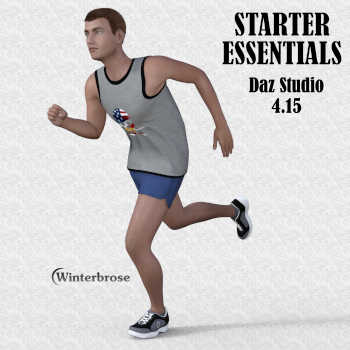

Table of Contents
How to Find Starter Essentials
Chapter 1: Introduction
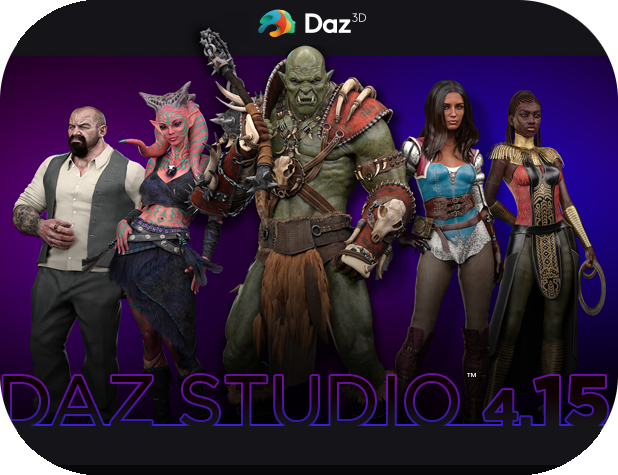
This tutorial was developed
using version 4.15 of Daz Studio. Be
sure to get an account at Daz3D and add the free Daz Studio 4.x Pro to
your
account.
https://www.daz3d.com/get_studio
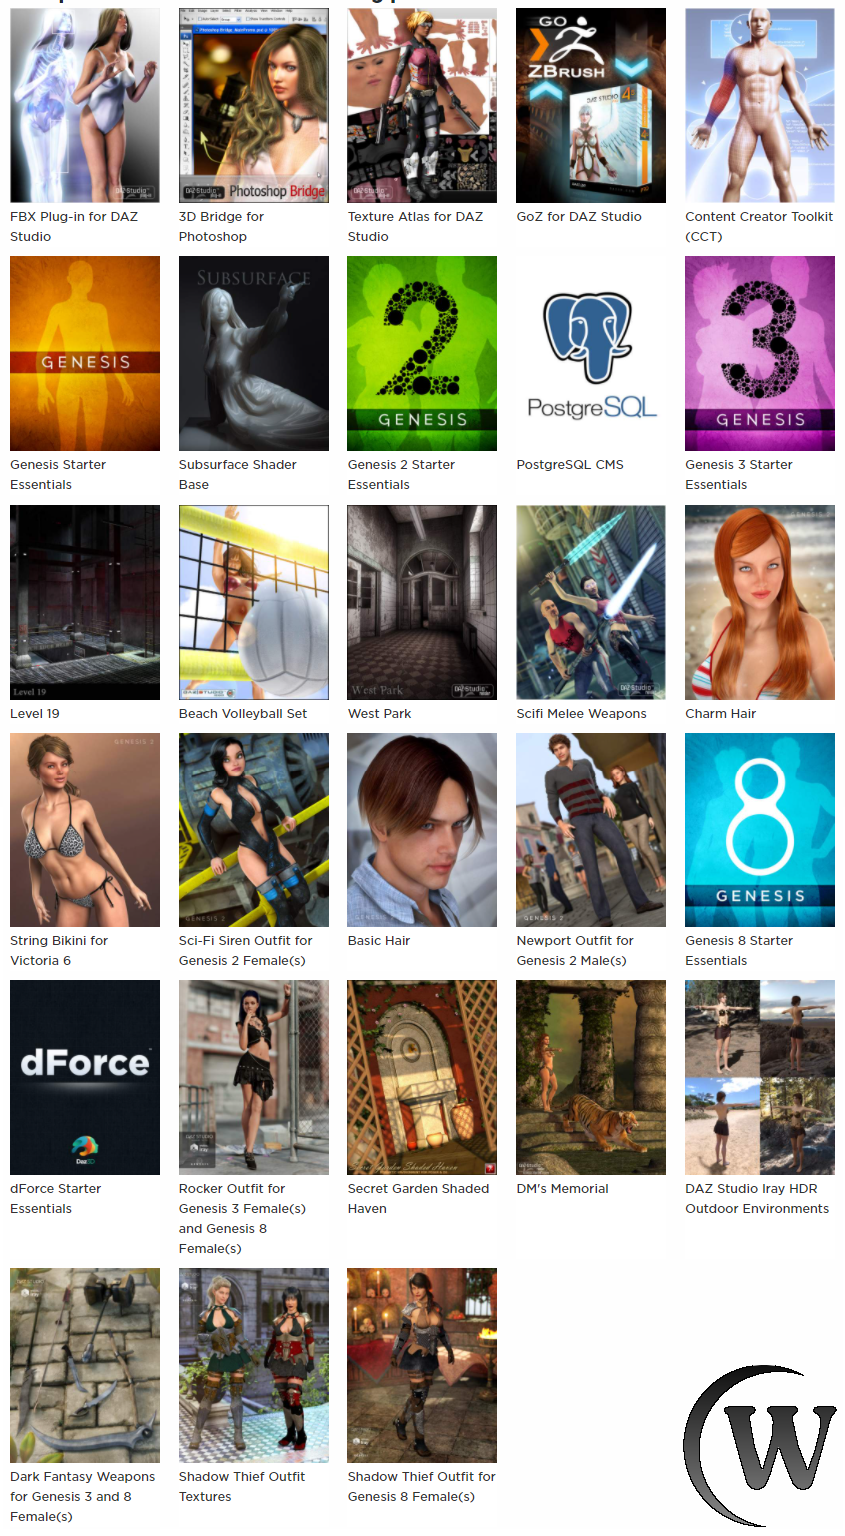
You won’t believe the number of
items included to get you started right away with your 3D projects. At the time of this writing, these items were
included for free:
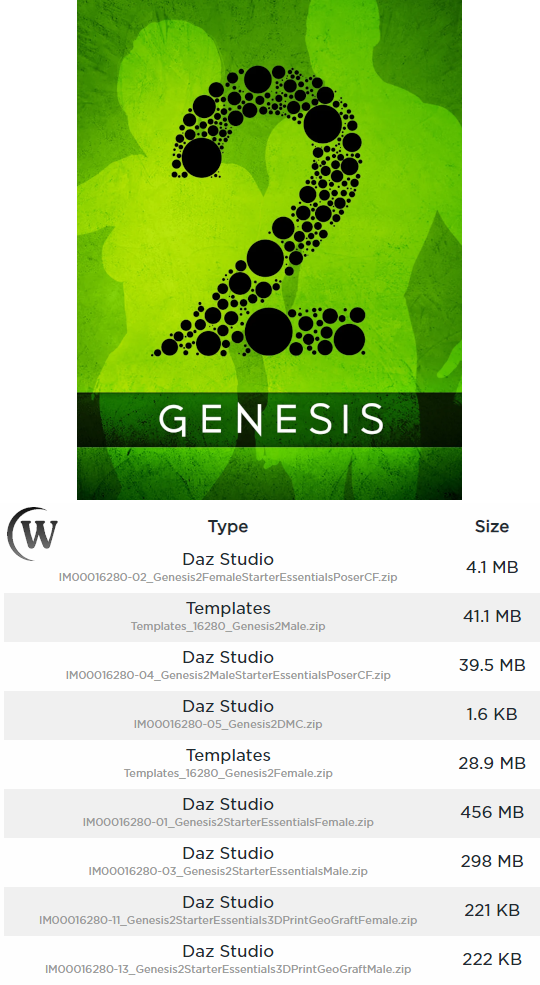
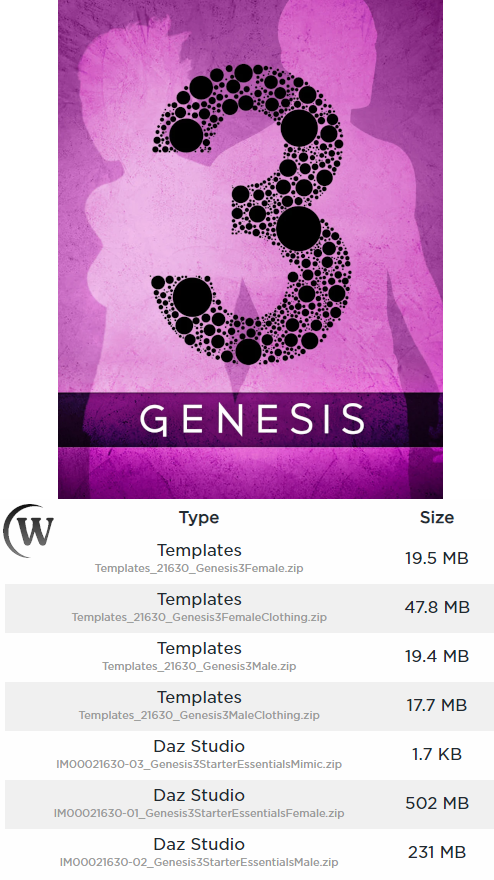
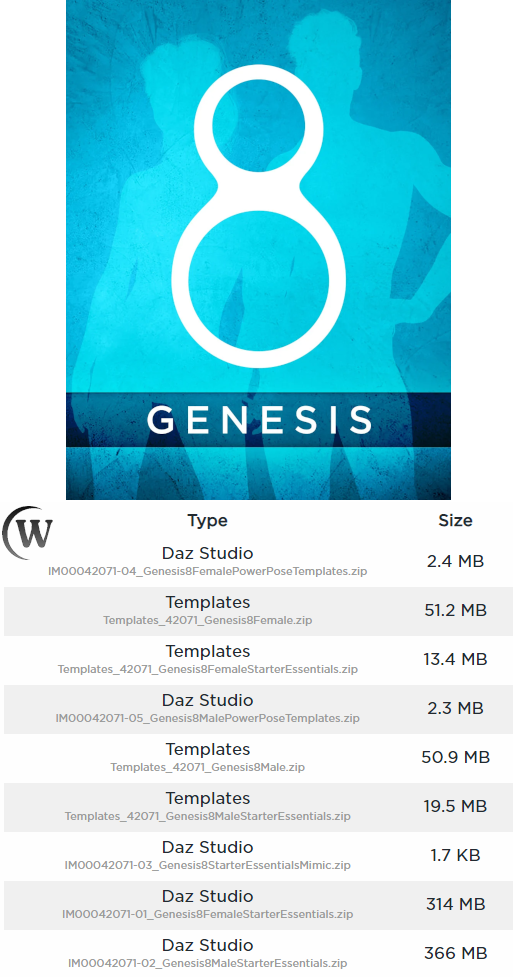
These are the four Starter Essentials packages we will be covering in this tutorial:
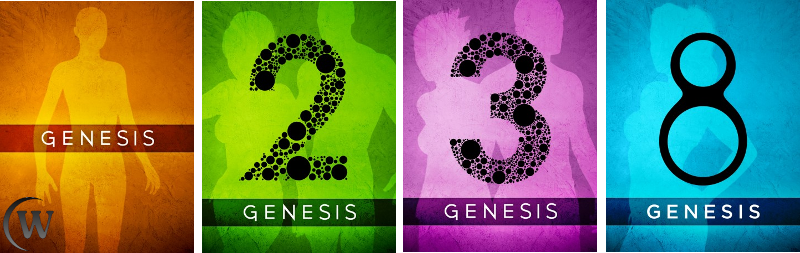
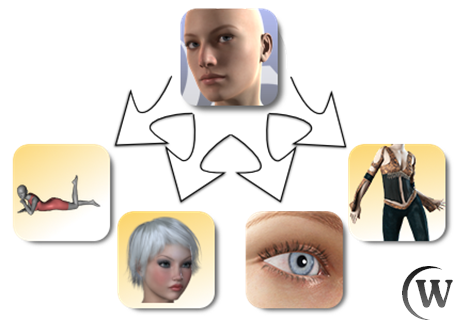
These bundles contain the essential types of items you will be using when working in Daz Studio to create projects. The bundles contain a variety of female and male figures that we will be using in this tutorial along with an assortment of products that go along with them. These include a variety of poses, hair colors, eye colors, material textures, and wardrobe (clothing/outfits) for all the Genesis line of figures.
We'll
be using these to start you out creating your very own scene, only
utilizing
the products available to us through each of the Starter Essentials
bundles. You can use the Daz Install Manager, Daz Connect, or
manually download and install the starter items. You can find the
links and download sizes below.
https://www.daz3d.com/genesis-starter-essentials
https://www.daz3d.com/genesis-2-female
https://www.daz3d.com/genesis-3-starter-essentials
https://www.daz3d.com/genesis-8-starter-essentials
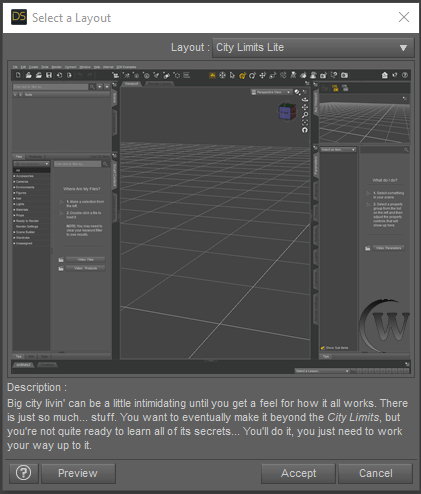
In DAZ Studio, there are multiple layouts that you can use. To find them and change your settings, go to Window->Workspace->Select Layout.
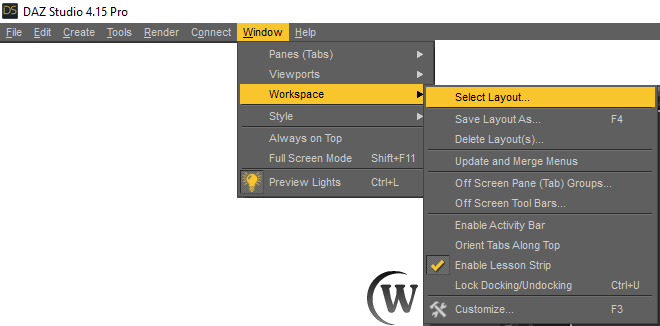
This tutorial will be using the 'City Limits Lite' layout. Choosing the same layout setting will make it much easier to follow along.
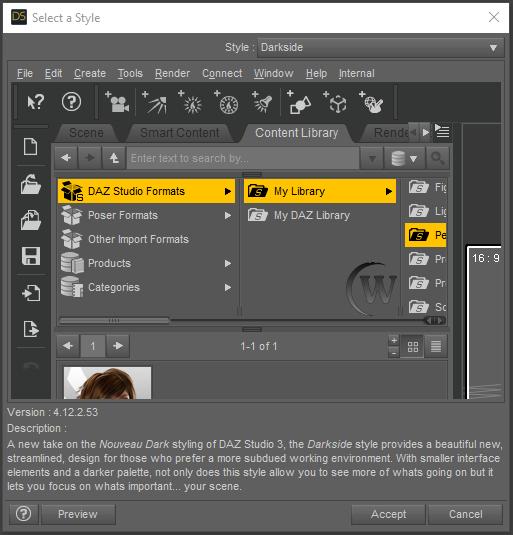
In DAZ Studio, there are multiple styles that you can use. To find them and change your settings, go to Window->Style->Select Style.

A style window will popup. Select the 'Darkside' style, then hit 'Accept' in order to use the same style that we use in this tutorial.
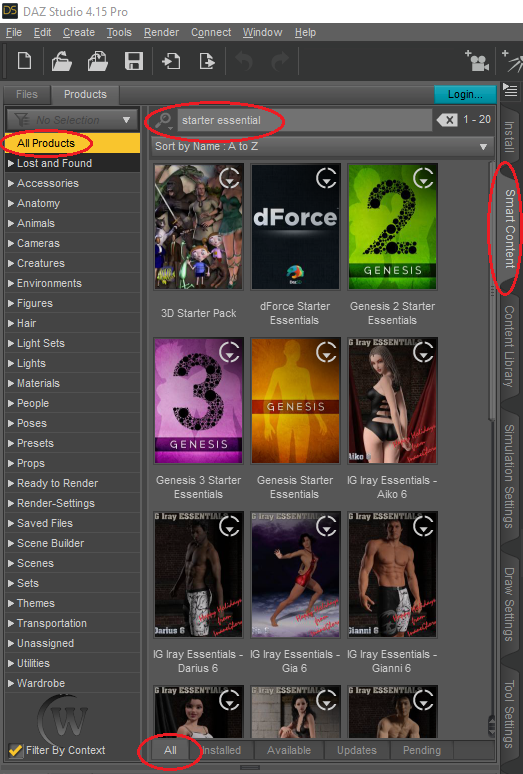
After opening Daz Studio, click on the Smart Content tab. Smart Content is the area we will be working in most. Select 'All Products' in the left column of your Smart Content section, and be sure you are on the “All” tab at the bottom. Then type 'Starter Essentials' into the search bar and hit the enter key. It should show you all the Starter Essentials kits you have available to you. You can see that we have installed the following product packages: Genesis Starter Essentials, Genesis 2 Starter Essentials, Genesis 3 Starter Essentials, and Genesis 8 Starter Essentials.
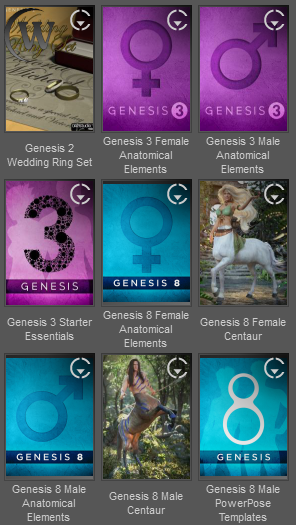
Do
not be alarmed if you are scrolling through the search results and see
several similar looking entries like shown below for the Genesis 3 and
Genesis 8 starter bundles.
If
for some reason Starter Essentials does not show up, make sure you have
them downloaded and installed using the Smart Content “Available” tab,
the Daz Install Manager (DIM), or manually install them. If they
are already installed and still do not show up, you may need to
uninstall and reinstall them.
To verify you have procured the packages, visit the Daz3D website at
“www.daz3d.com” and log into your account.
• Log into your DAZ3D account.
• Click the "My Account" link in the upper right.
• Click the "Product Library" icon.
• Type "starter essentials" in the filter box and hit
return.
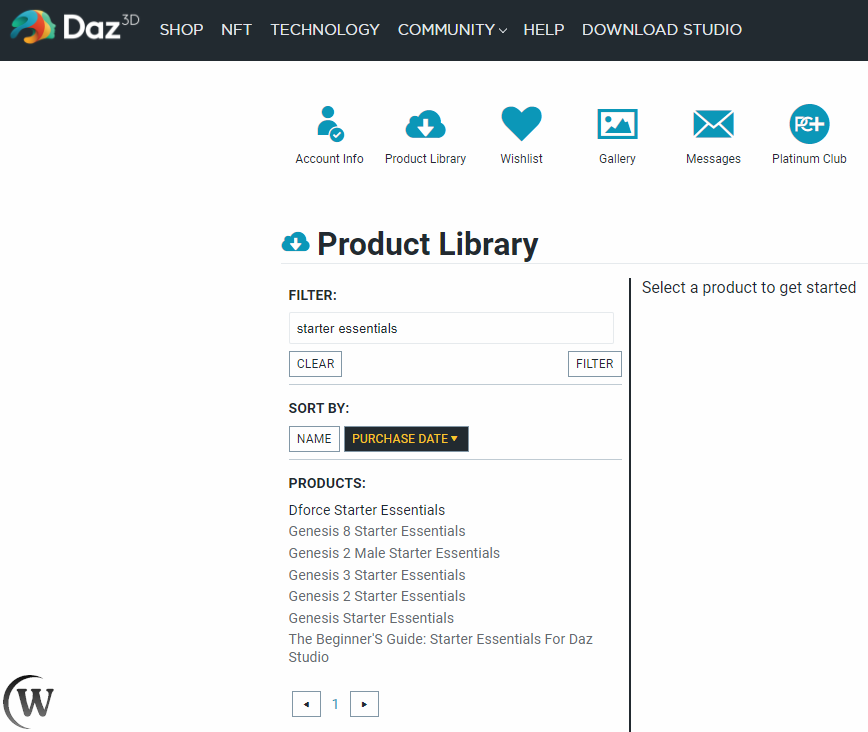
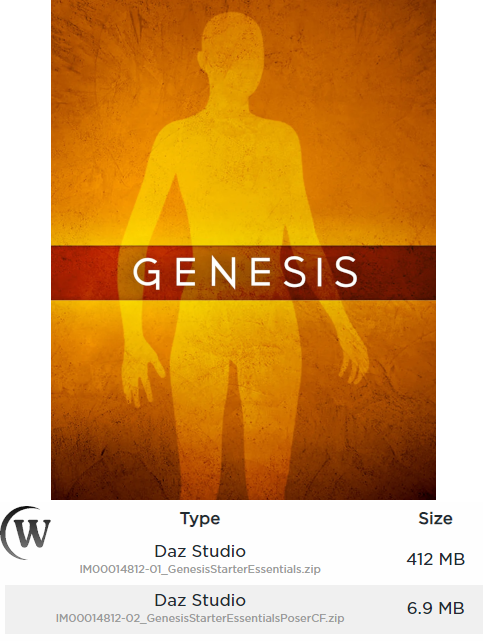
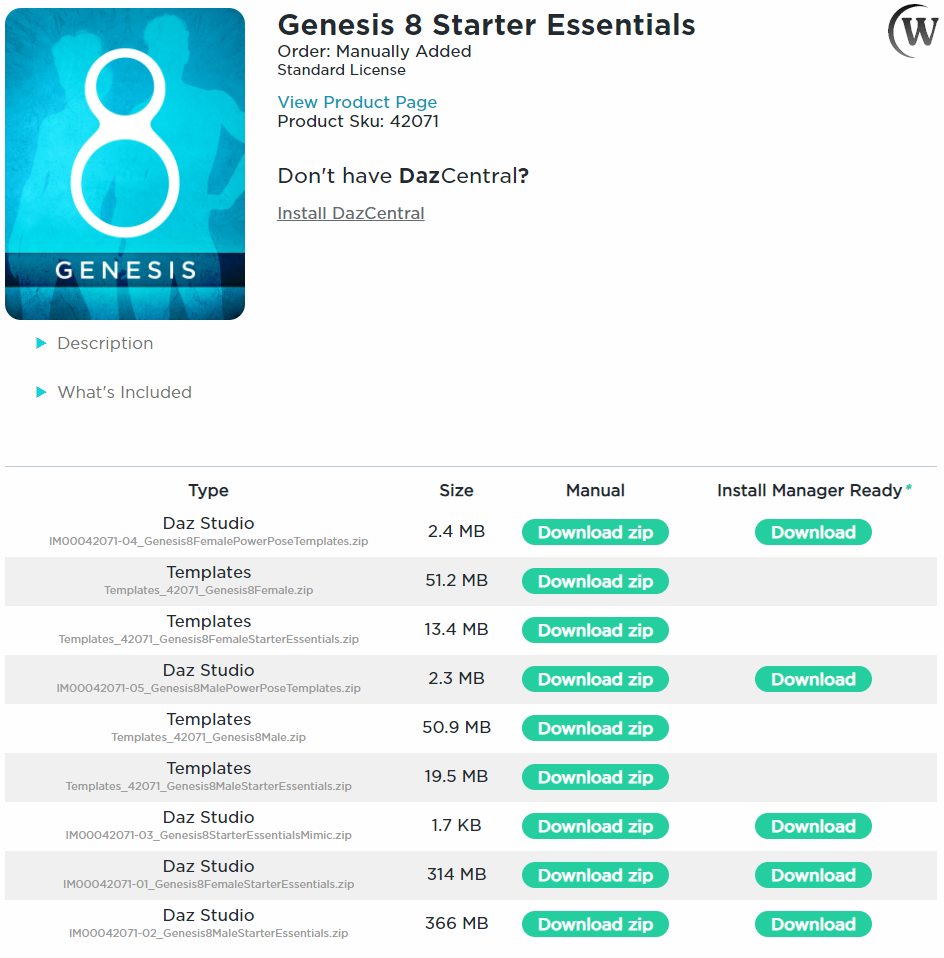
You can then click each link for the Starter Essentials to see the number of files and sizes of each. You will also see which files can be installed manually or using the Install Manager (DIM).
If you have the DAZ Install Manager (DIM), you can download and install them using that as well. You should filter your search using 'starter essentials'. If it's already installed it will show up in the 'Installed' tab.
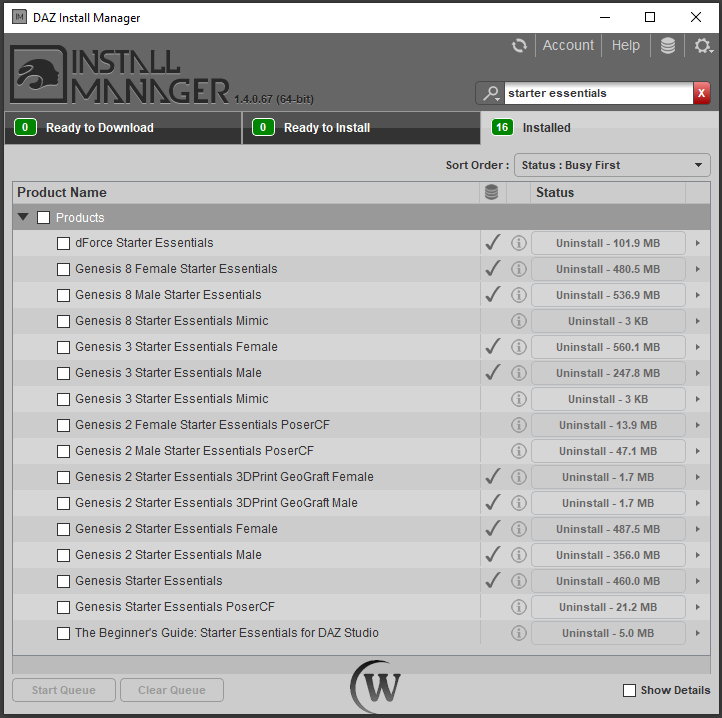
If not installed, look for it in the 'Ready to Download' and 'Ready to Install' sections to get it downloaded and/or installed as needed.
Chapter 2: Making A Scene
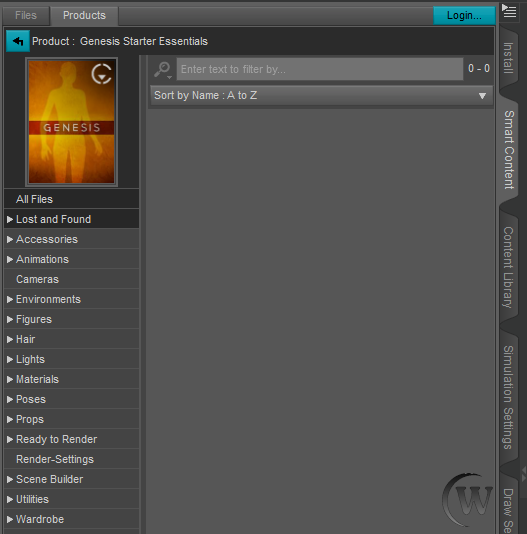
Once you find the Starter Essentials bundles you can double-click any of them to open up their contents. Double-click the Genesis Starter Essentials that we found in the previous chapter in order to open up its contents so we can get to work.
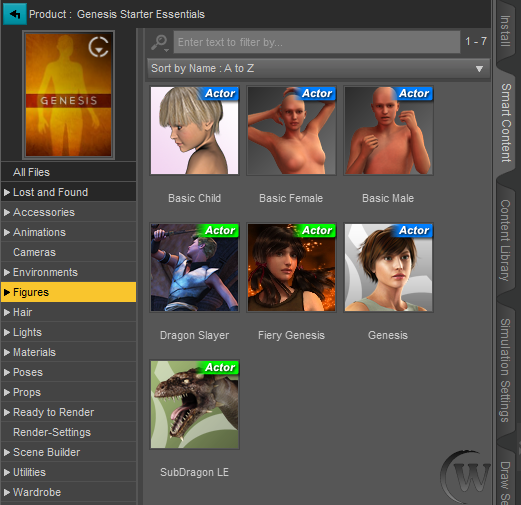
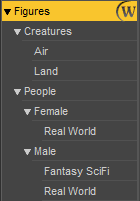
Once you open up the "Genesis Starter Essentials" pack, expand the figures section by clicking on “Figures” in the left column. To add the Genesis figure to your default scene, just double-click the thumbnail of the Genesis figure, or left-click drag and drop the icon onto the scene in the viewport as shown in the image below.
You can refine the matches by expanding the left-column entries.
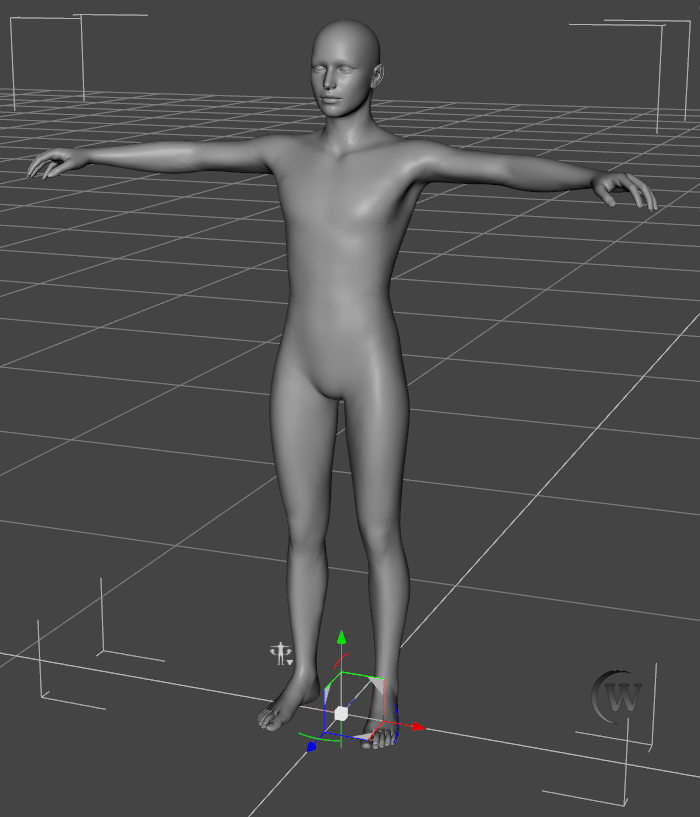
If you added the Genesis figure correctly, it will show up in your viewport.
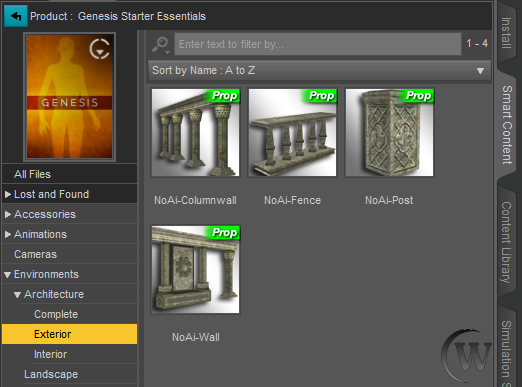
In the left-column, expand the hierarchy completely so that you can see the “Exterior” entry. Select it to see the props provided for outside structures. The same way that you added the Genesis figure, add the 'NoAi-Post' prop to the scene.
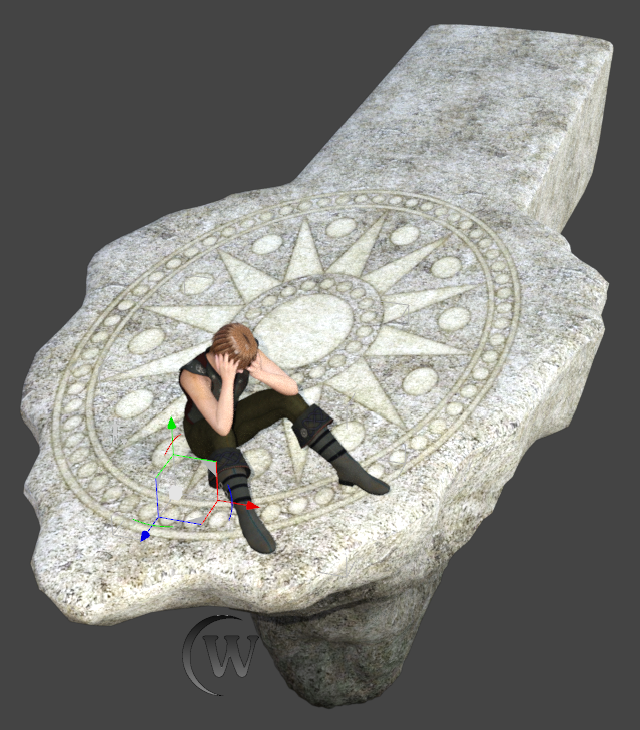
Your scene should look something like the below image. In our scene, we have the initial figure we loaded as well as our prop. They both had predetermined coordinates they loaded onto. In this case, both predetermined coordinates were the same and each object loaded right on top of the other, which is why the Genesis figure looks to be inside the pedestal prop.
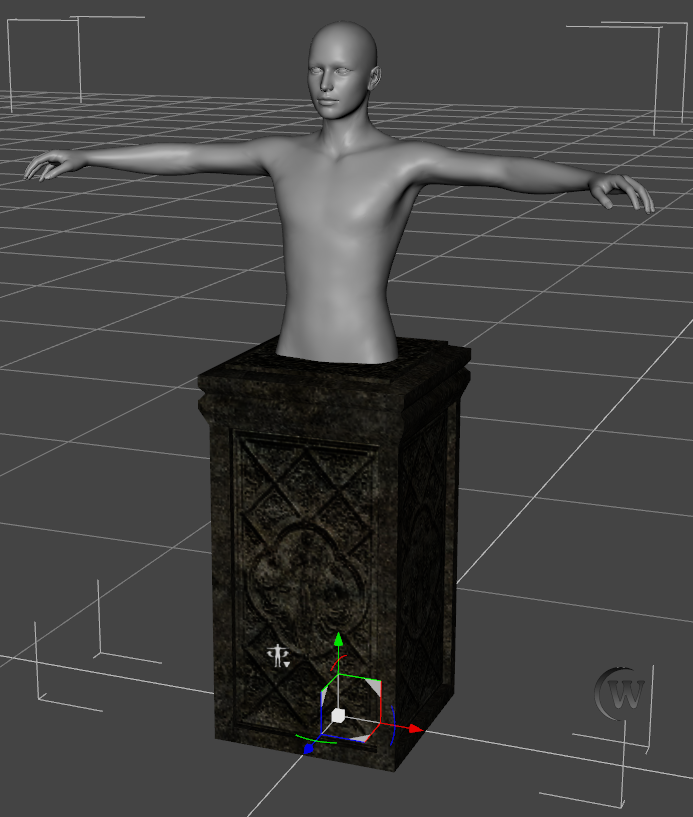
NOTE: Many figures and props are designed to load at the location in 3D space commonly referred to as the “World Center” at coordinates 0,0,0.
When we start loading in clothes, we will load them in different predetermined coordinates, for instance a shirt will usually be loaded onto the figure's chest.
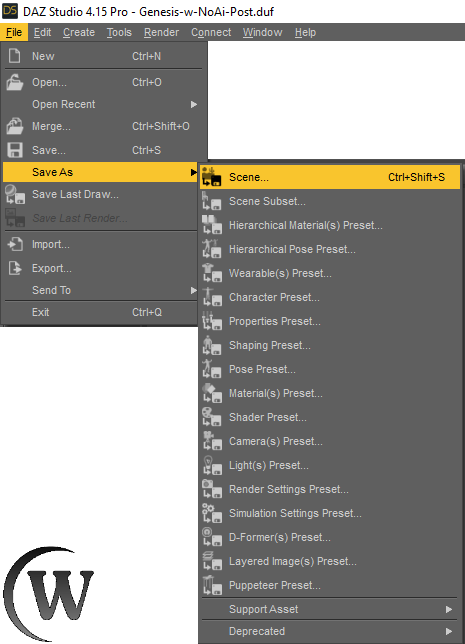
To save your current scene, go to File->Save As->Scene... You can then browse to your desired location and save your scene as a “.DUF” file. Later you can load these scene files back into DS to be worked on again.
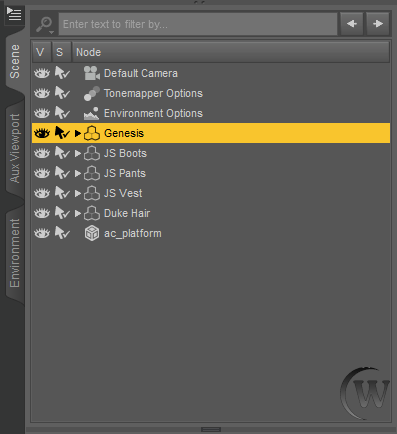
Find your Scene tab to the right of your viewport in DAZ Studio. There you will see a list of objects currently in your scene. You can delete an object by selecting it and hitting 'Delete' key or right-clicking and using “Remove Item from Scene”.
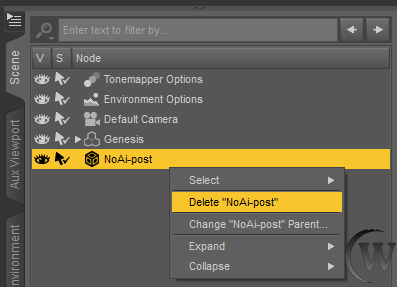
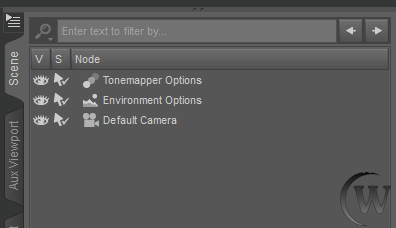
Go ahead and delete every object in your scene with exception to Default Camera.
Putting It All Together
For this tutorial, we could have used any of the Starter Essentials, but we chose to continue with the Genesis figure because it helps you begin to understand where to find items in the Smart Content tab, and how they relate to each figure that the item was created for.
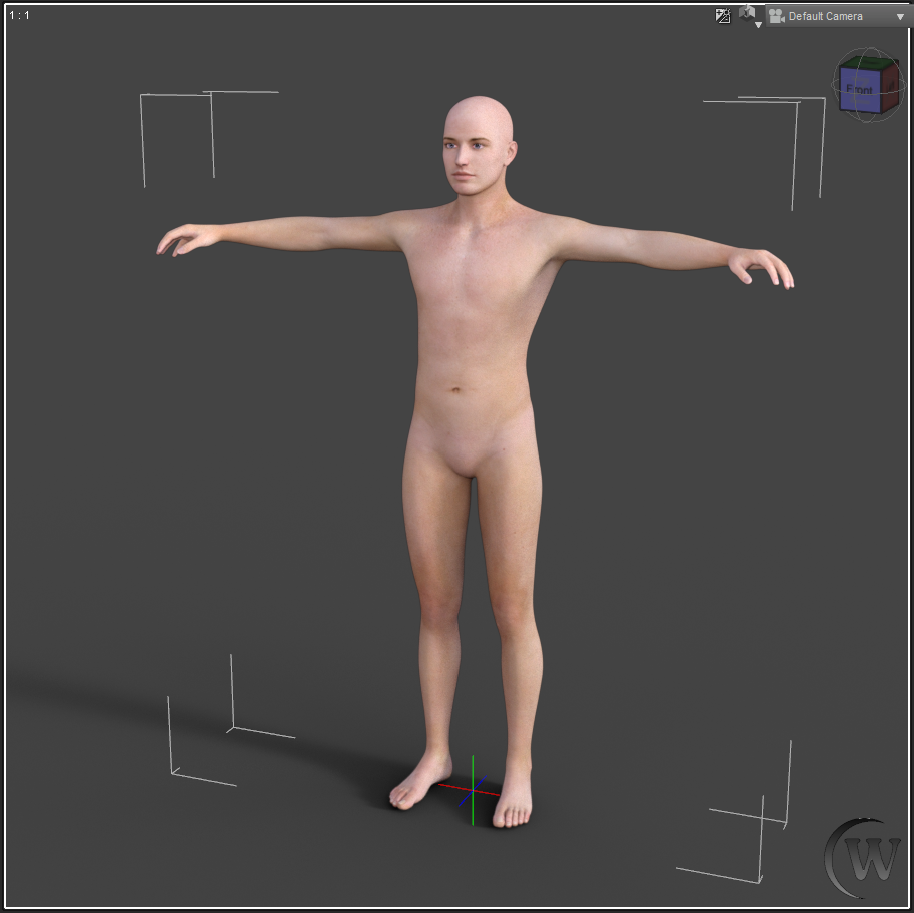
Now that you've seen how to manage items in your scene, let's make a real scene. Start by creating a character to put in it. Add the 'Basic Male' figure to the scene.
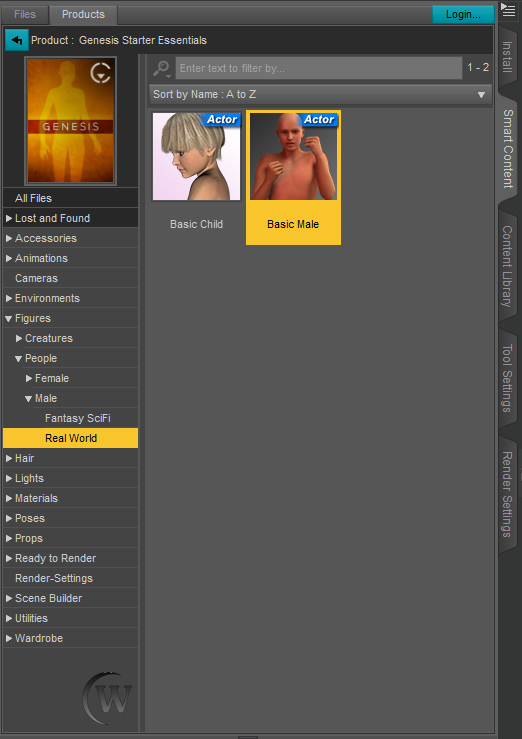
Genesis Starter Essentials / Default / Figures / People / Male / Real World
The Basic Male figure currently is quite naked. So let's give him some clothes.
NOTE: When loading items like clothing and hair “onto” a figure, be sure that the figure is still selected in the Scene tab.
Go to Wardrobe->Footwear and add 'JS Boots' to the scene by double-clicking.
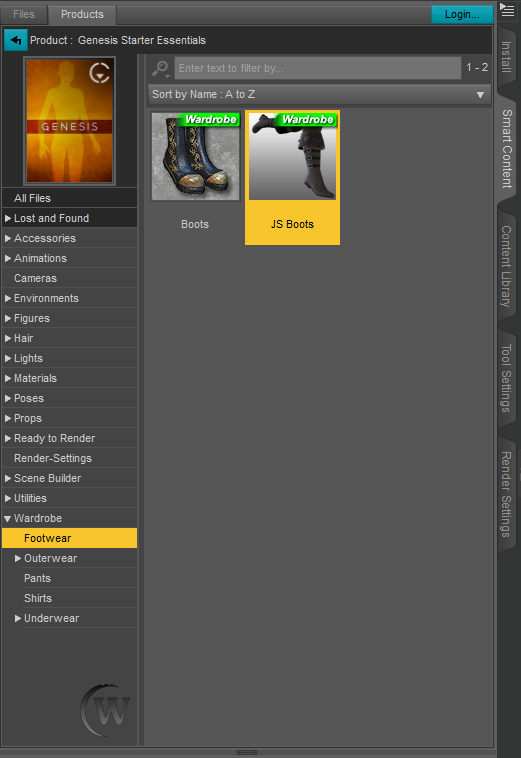
Genesis Starter Essentials / Default / Wardrobe / Footwear
Go to Wardrobe->Pants and add 'Js Pants' to the scene.
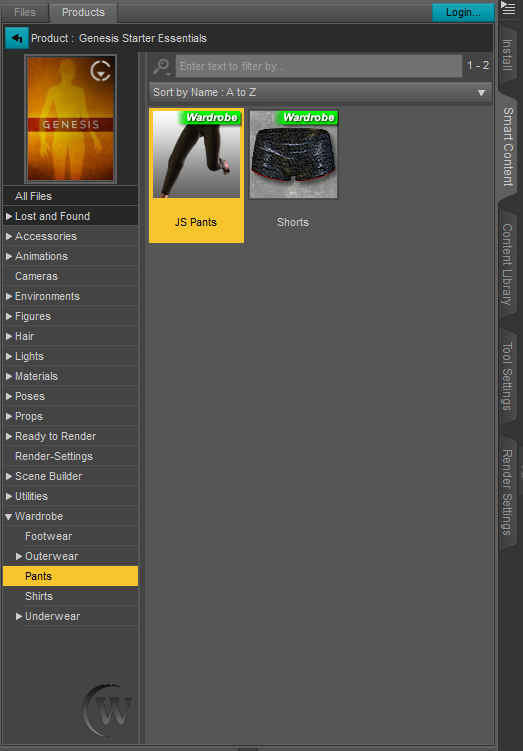
Genesis Starter Essentials / Default / Wardrobe / Pants
Go to Wardrobe->Shirts and add 'Js Vest' to the scene.
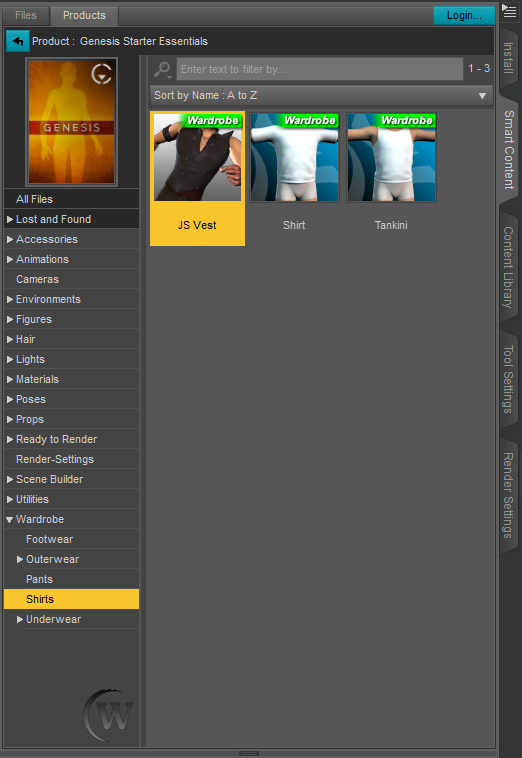
Genesis Starter Essentials / Default / Wardrobe / Shirts
Now your Genesis figure will be stylish in his new wardrobe!
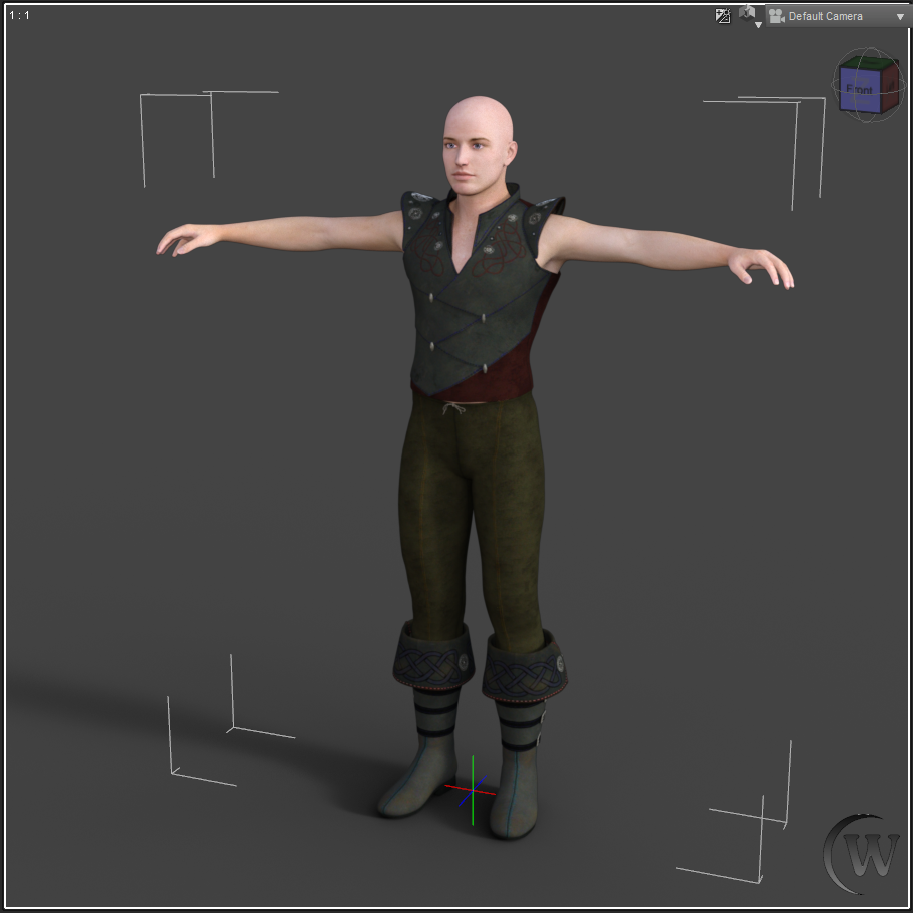
Now let's give him some hair; go to Hair->Short and add 'Duke Hair' to the scene.
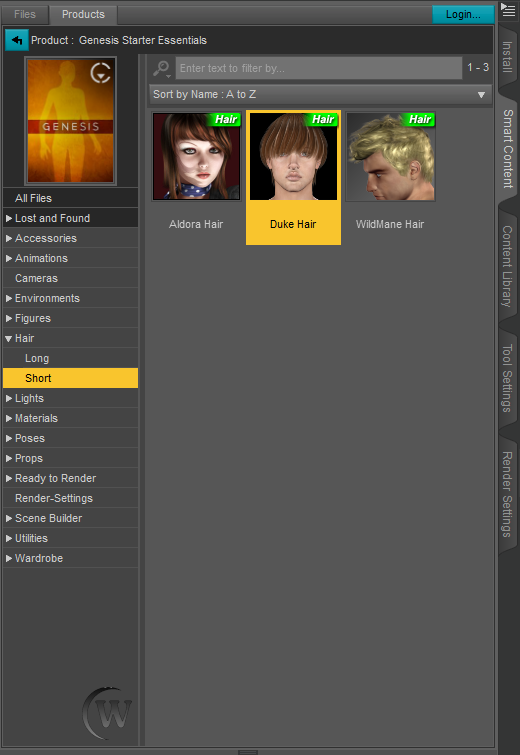
Genesis Starter Essentials / Default / Hair / Short
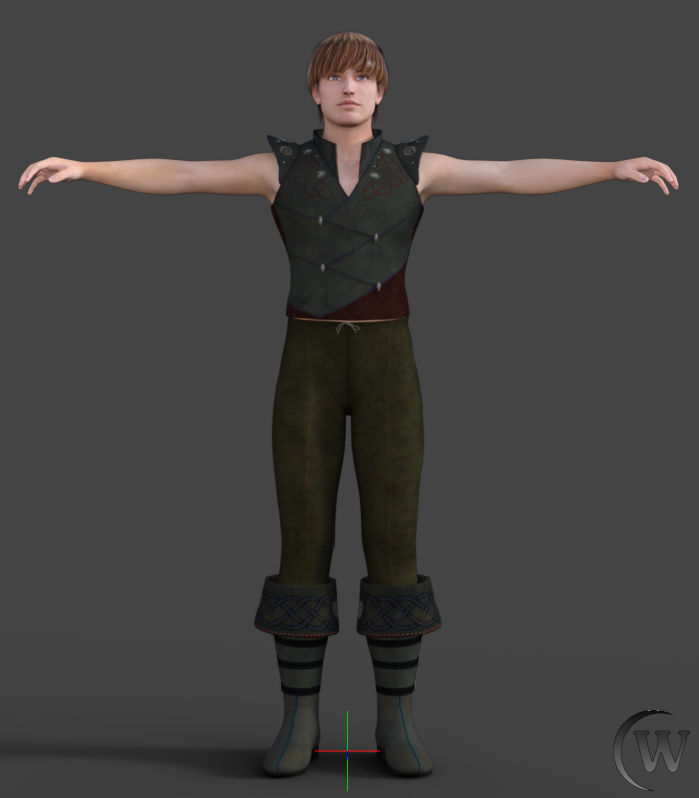
Now he's fully clothed and has a nice head of hair.
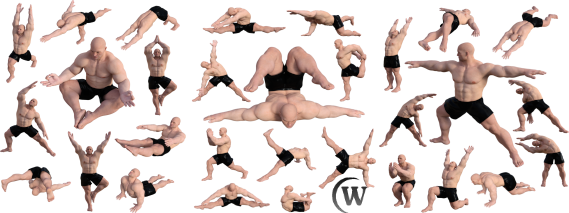
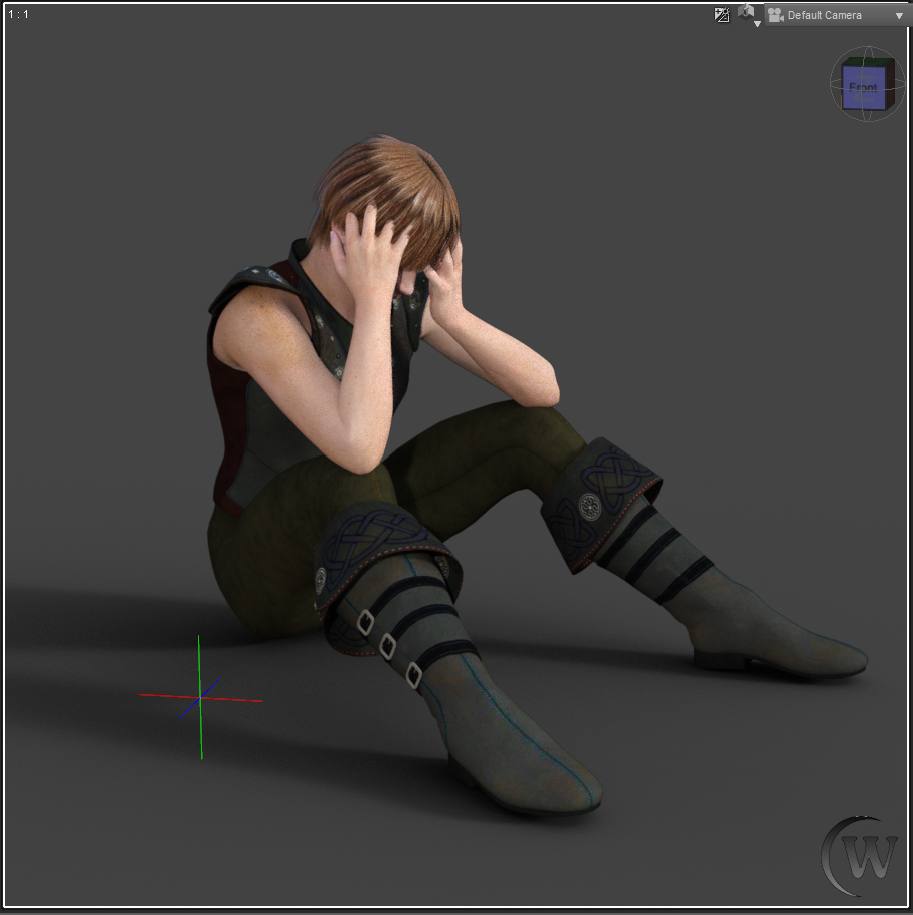
Let's give our male figure a nice pose. Go to Poses->By Function->Sitting and add 'Male Sad 02' to the scene.
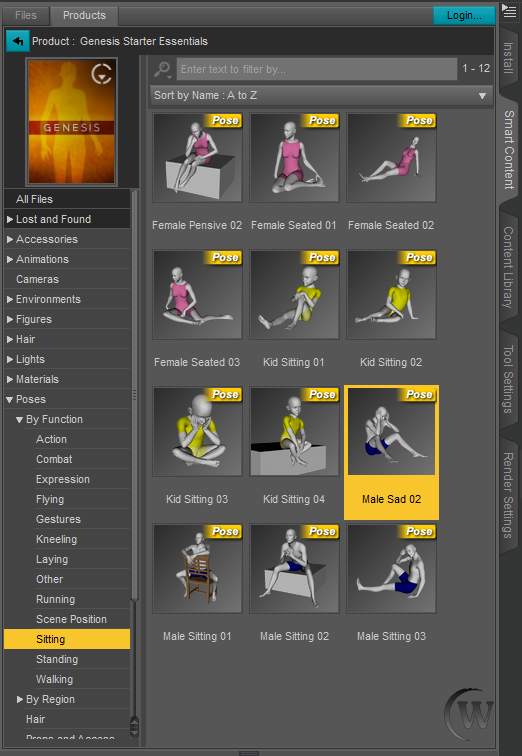
Genesis Starter Essentials / Default / Poses / By Function / Sitting
If all worked well, your figure should look something like the image below.
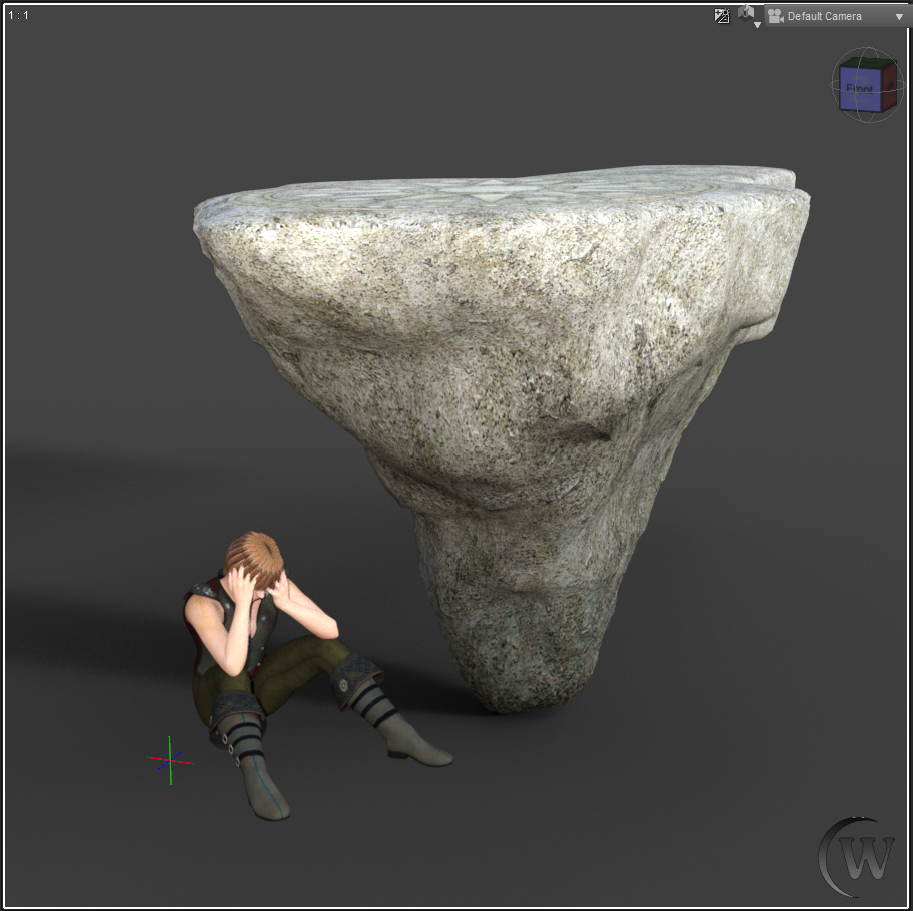
In order to create a better looking scene, let's add in a prop that he can sit on. Go to Props->Furnishings and add 'Platform' to the scene.
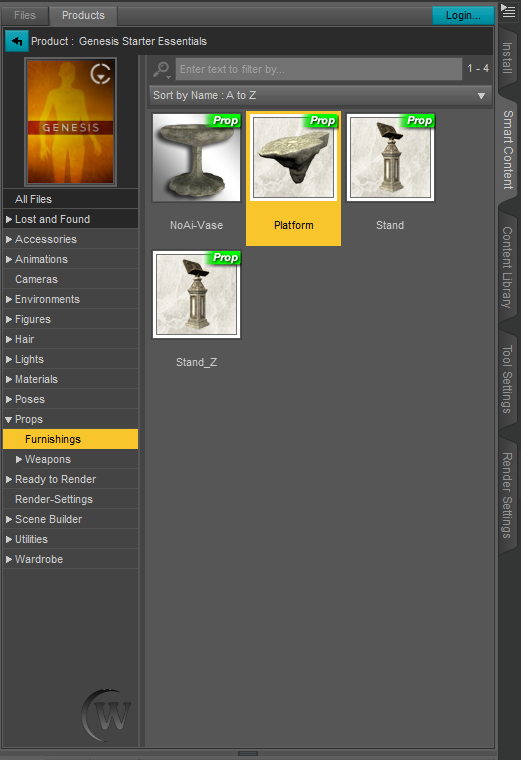
Genesis Starter Essentials / Default / Props / Furnishings
We now have our figure and the Platform in the scene.
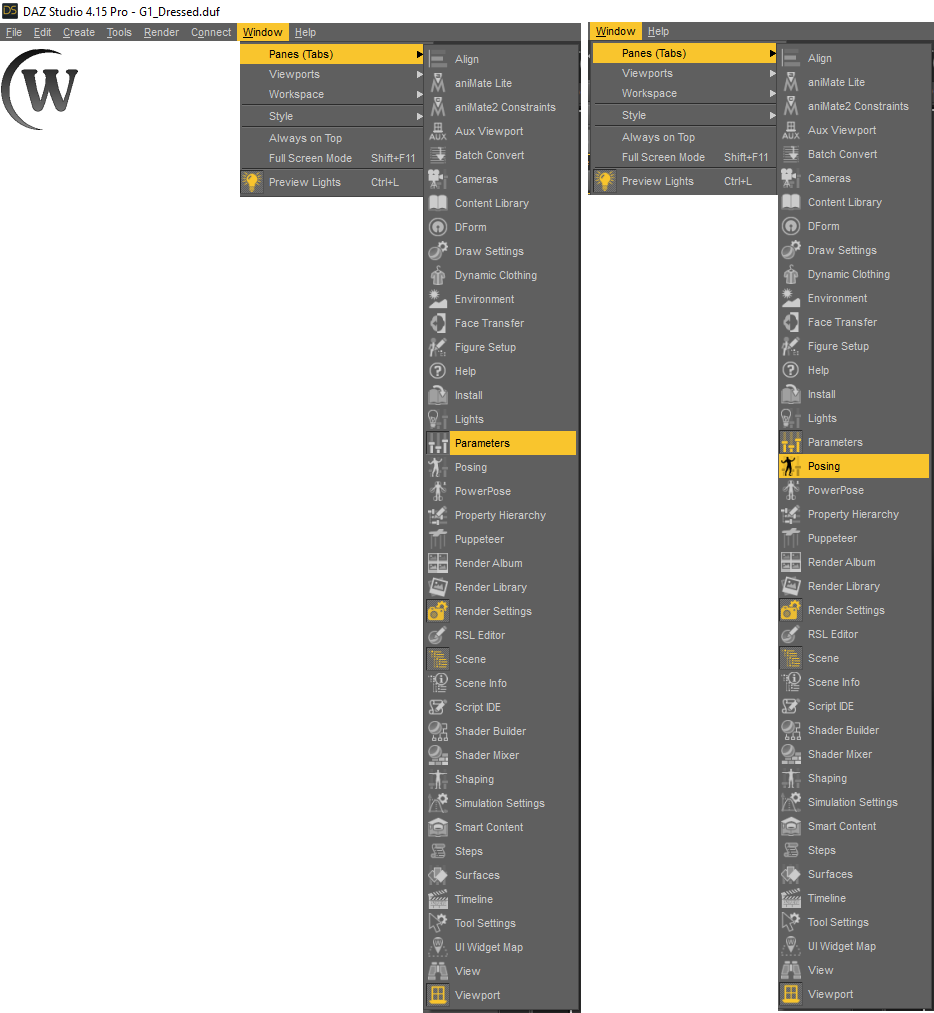
To make changes to items in the scene, you can use the Parameters tab, Posing tab, Universal Tool and more. If you do not see either tab, they can be enabled/selected using the Windows / Panes (Tabs) option on the main menu bar. The Universal tool allows you to manipulate selected items directly in the Viewport, however we will be using the Parameters tab to make our changes.
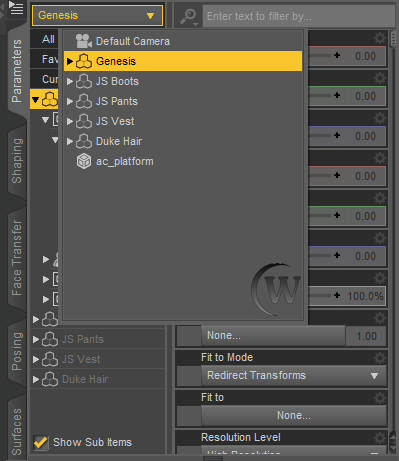
On the Scene tab in the right-side of the screen, ensure that Genesis is selected.
You can also select the Genesis figure from the dropdown menu at the top of the Parameters tab.
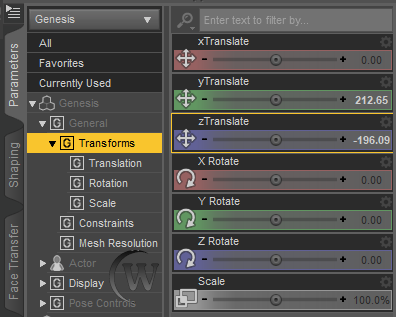
To simplify the view, expand the Genesis entry and expand the General section and then click on the menu item Transforms.
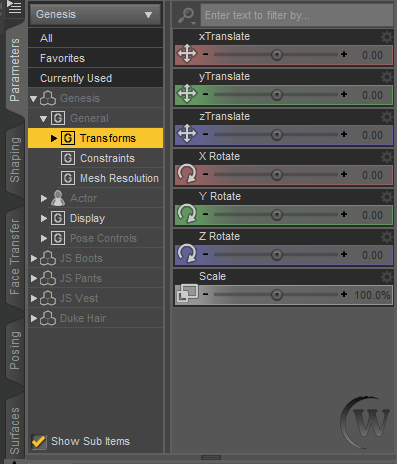
Once you have the Parameters section open on
Transforms for your Genesis figure, you can start manipulating it using
the Translation, Rotation, and Scale options on the right-side
using the sliders.
Translation simply means to move an object. The X direction is
Right-and-Left, the Y direction is Up-and-Down and the Z direction is
Forward-and-Back.
Using the yTranslate slider, click-and-hold the button in the middle and slide it to the right, making your Genesis figure rise upwards. You can see the Y value changed to 212.65 (a positive value).
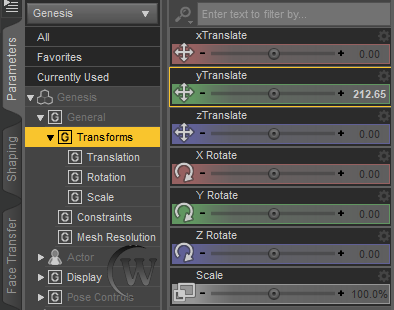
NOTE:
For Y-translate slider, moving right is upwards while moving left is
downwards.
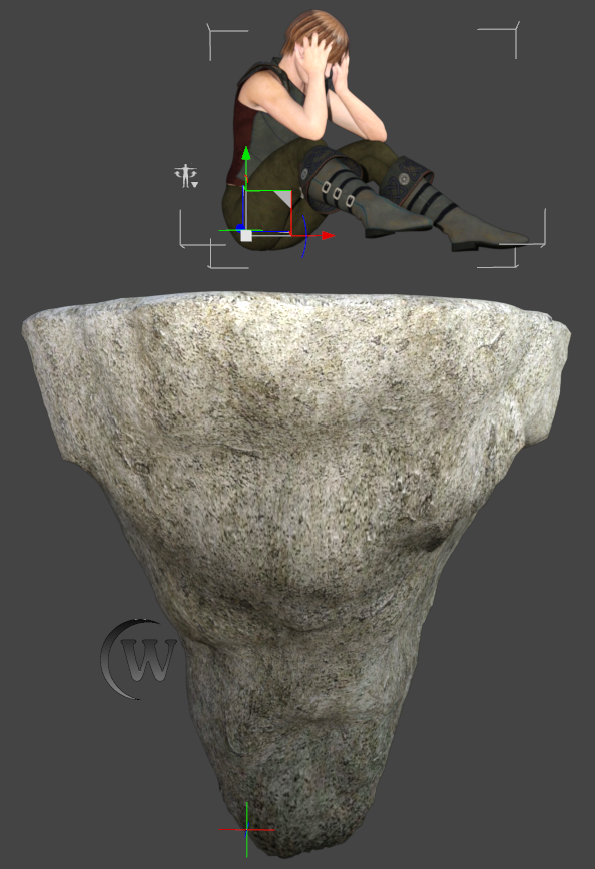
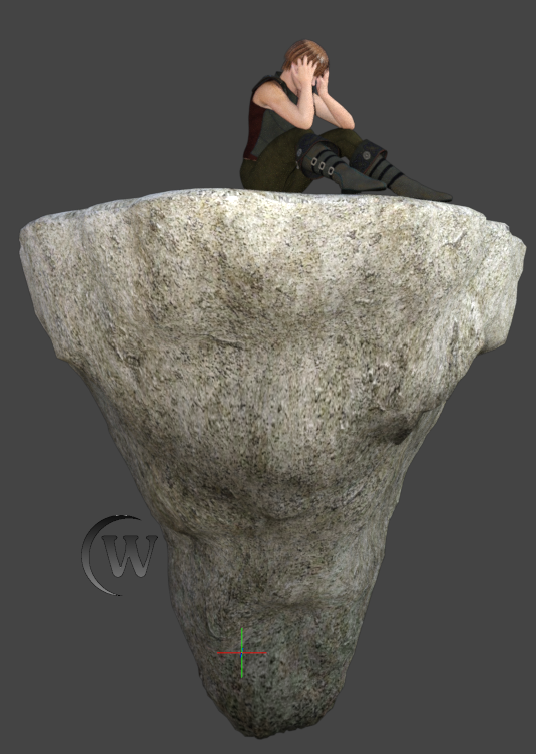
Now that he is floating above the platform,
change the viewing angle and you will see that he isn’t actually over
the platform.
You can use the View Vantage Cube
(shown below) to rotate your view for different perspectives. In
addition, use the other controls to the right of the cube for more
maneuverability.
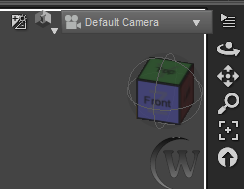
To use the cube, hover your mouse over the cube-shaped control, then
click-hold your left mouse button down, and move your mouse to rotate
the view with the active control. Release the mouse button once you
have the desired view.
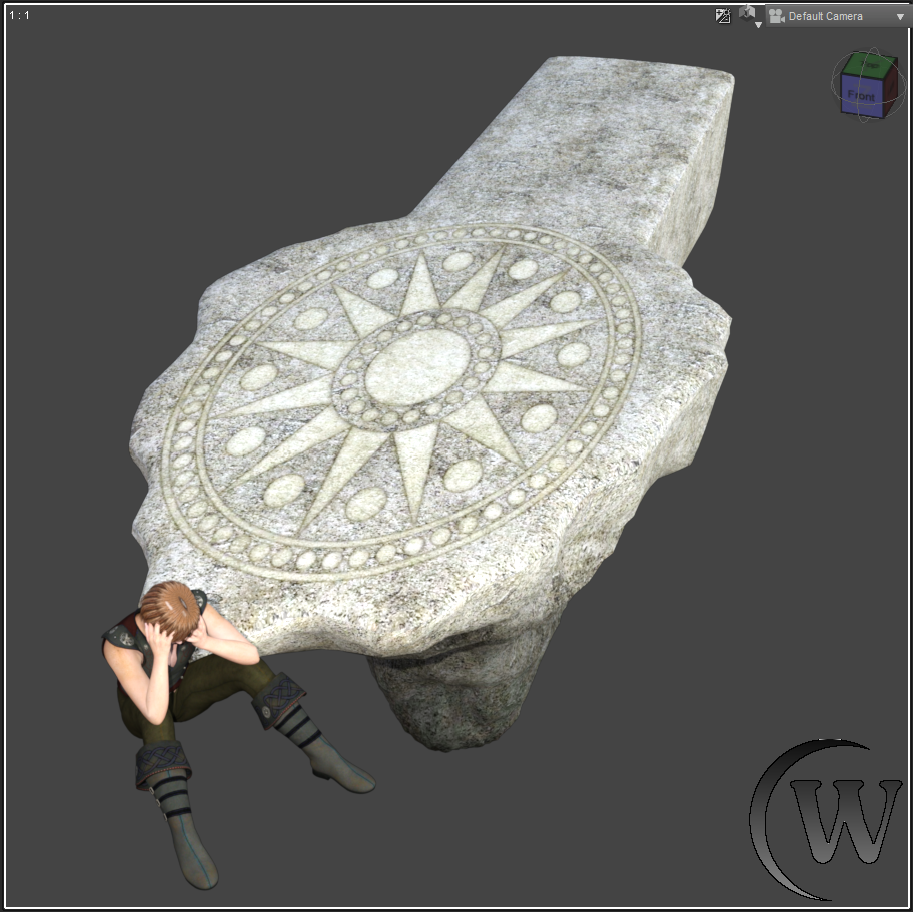
Now use the xTranslate and zTranslate sliders to adjust him so that he is over the platform. Move the zTranslate track bar to the left to make your Genesis figure go towards the rock platform.
As it
turns out, we didn’t need to adjust the X translation at all.
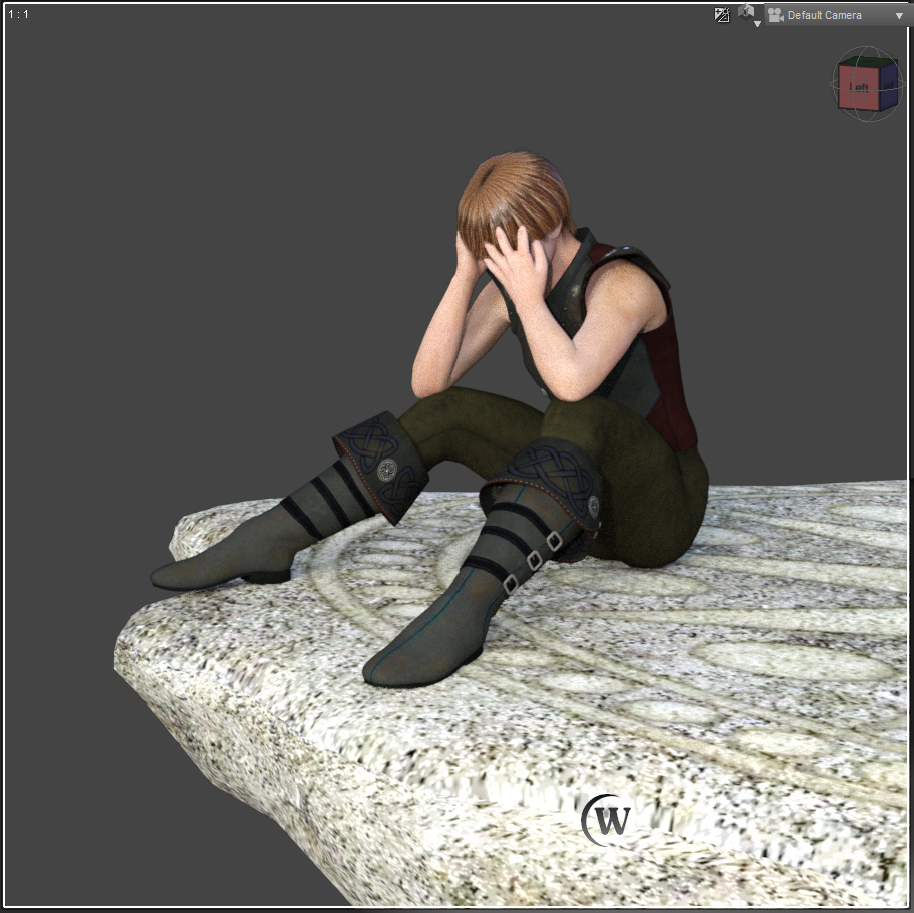
Now change the view to Front by clicking the word Front on the cube.
Once you are finished moving him, admire the scene you have just created.
Now all you need to do is make any final adjustments to the xTranslate, yTranslate, and zTranslate to move the figure how you want him to be sitting. Once you are finished moving him, admire the scene you have just created.
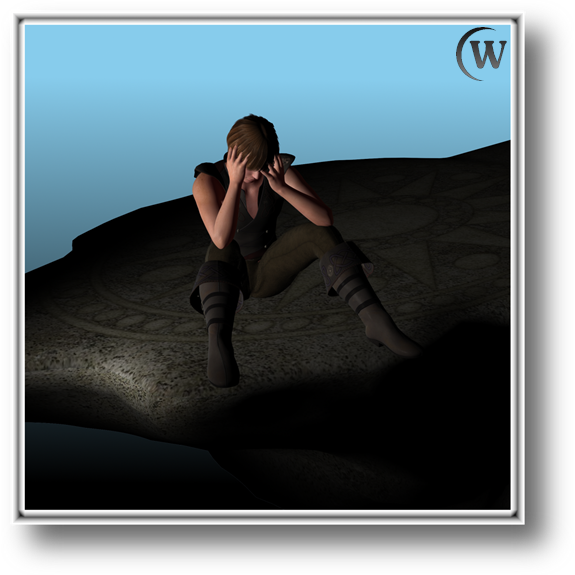
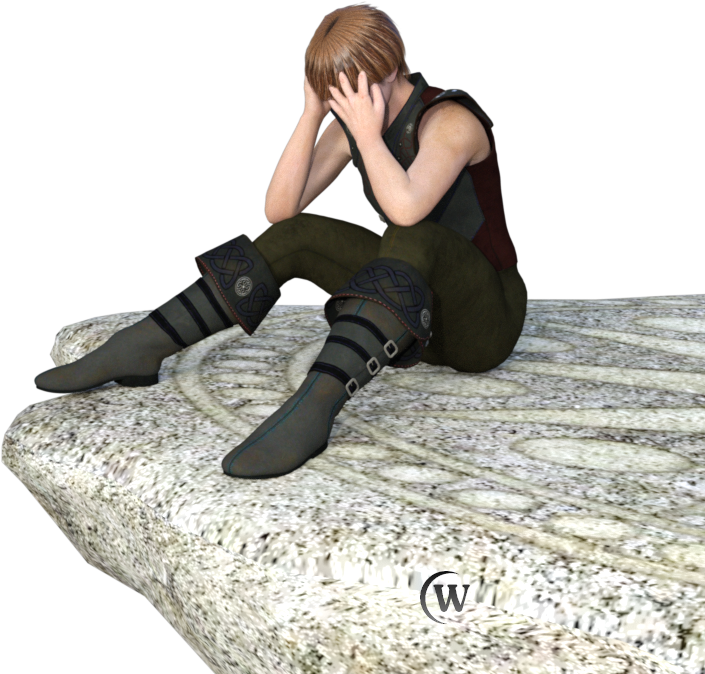
Here is the final rendered scene using Iray.
Chapter 3: Rendering
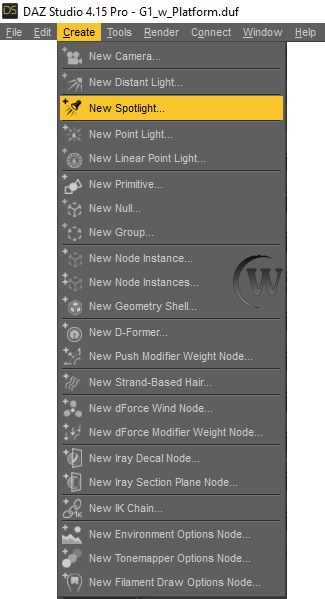
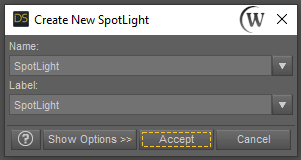
Now that we have our scene created, it's time to Render it. Before we do that, we should add some lighting to the scene. Go to Create->New Splotlight to add a light source.
You can then name the light source using the window that pops up.
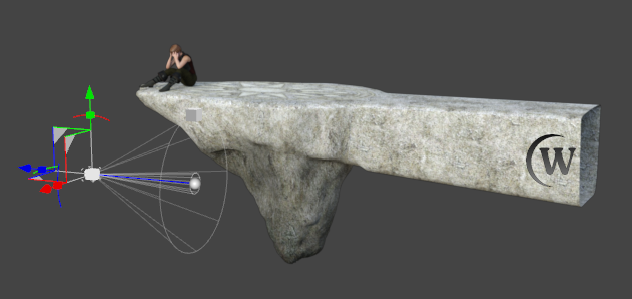
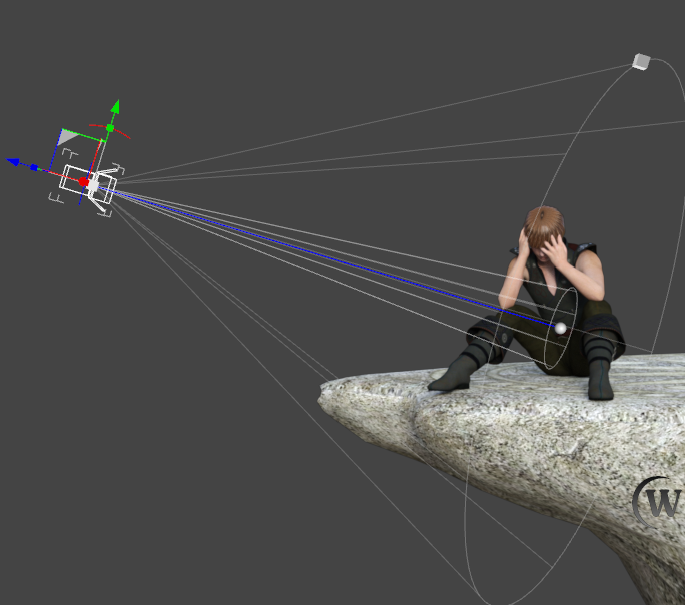
Once your light source is added, you can manipulate it like other props. Find the light source in your scene.
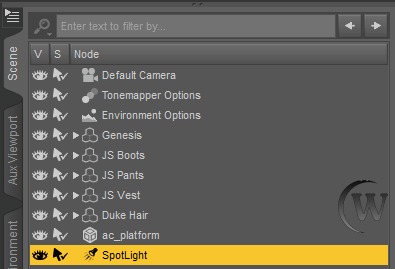
As you can see, the Spotlight is positioned below our figure sitting on the platform.
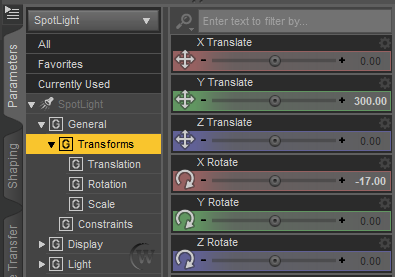
You can use the Parameters section to manipulate the Spotlight, making it point in any direction you want and moving it as needed. Move the light source upwards by using the Y Translate track bar, so that it is closer to our Genesis figure. Then change to the Rotation transform and rotate the spotlight using the X Rotate to point it at the Genesis character.
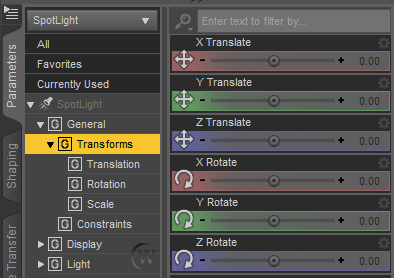
We used values of 300.00 for the Y Translate and -17.00 for the X Rotate.
Maneuver the Spotlight until it's in the appropriate position, where it lights your Genesis figure up.
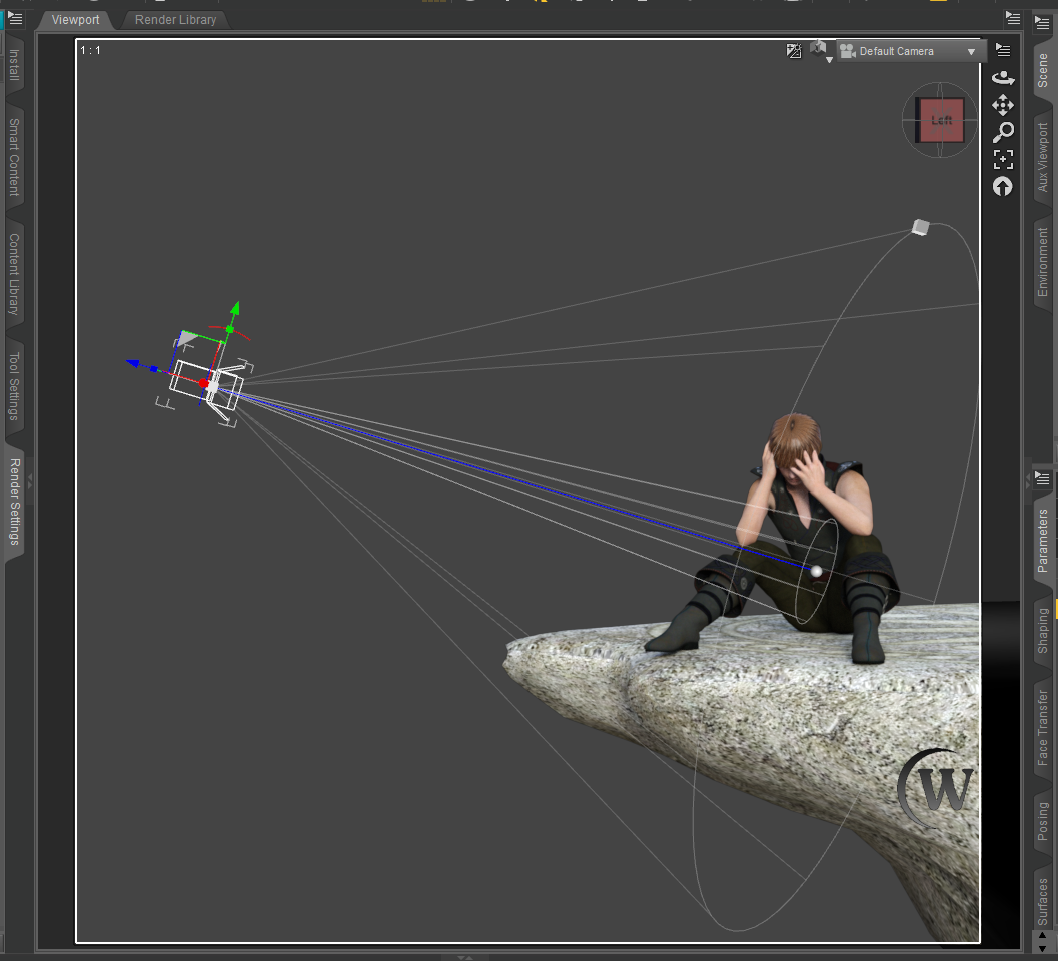
For rendering it's a good idea to know what your render will capture. To see ahead of time, you can turn on the aspect frame. Click the icon at the top right of your scene preview window. Then check the 'Show Aspect Frame' option.
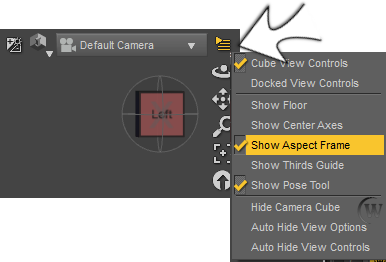
Once it's checked, a bordered box appears, showing which region of the viewport your render will capture.
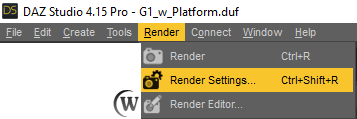
Before you actually render the scene, you can go to the 'Render Settings' under the Render menu bar option.
Your Render Setting panel may be floating or docked in one of the panels beside the Viewport.
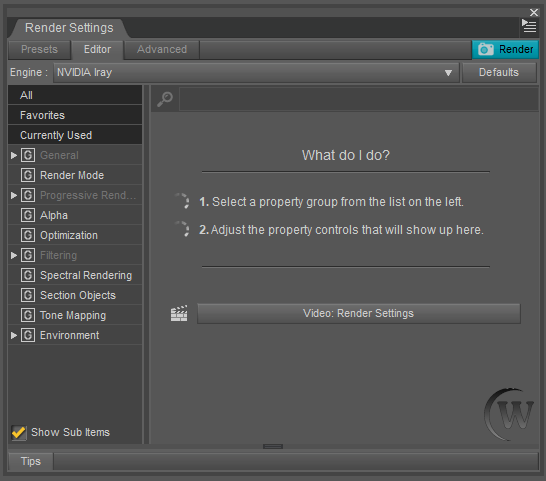
FLOATING Render Settings panel
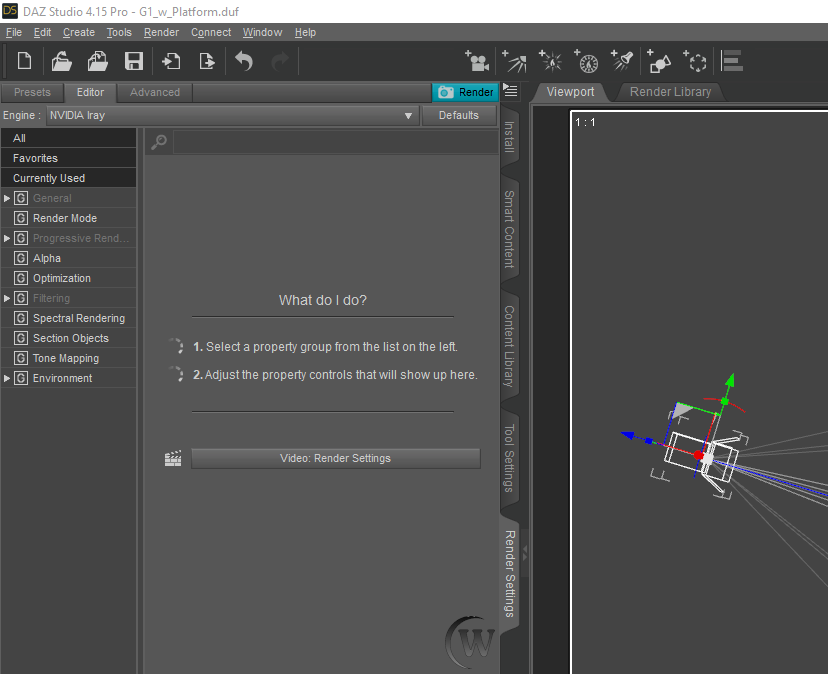
DOCKED Render Settings panel
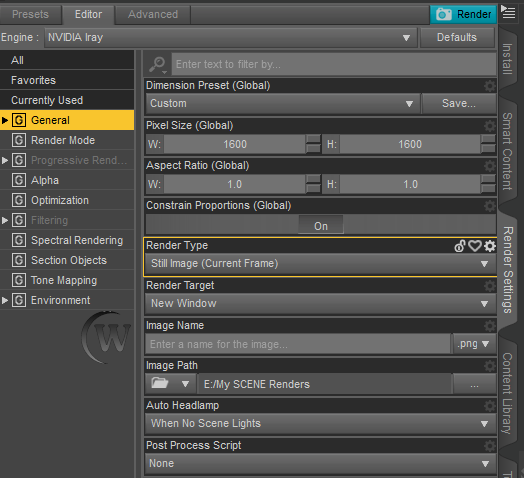
In the General section, you can change the size of the Render and many other options. There is also a Render button (light blue) at the top-right of the window when you are ready to Render.
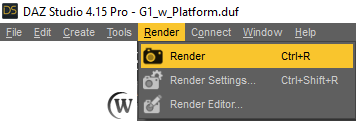
You can also find Render under Render on the menu bar. Click on the selection in the menu bar or use the shortcut listed to the right (ie 'Ctrl+R') to create a Render.
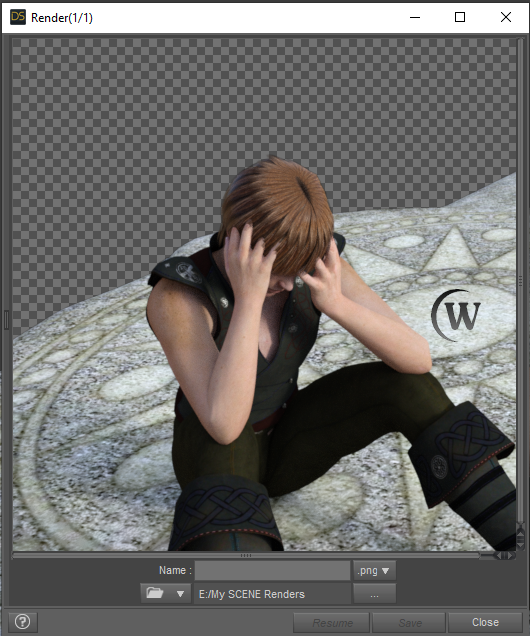
Once you start rendering and depending on the settings you use, a new window will pop up as it creates the rendered scene. You can then save the image once it's finished rendering.
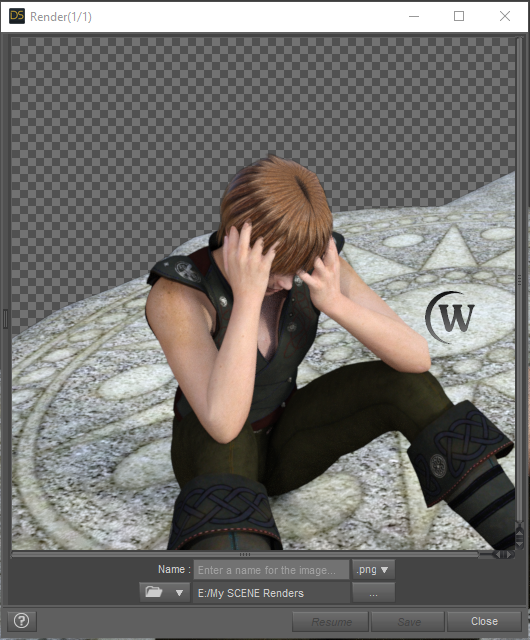
Daz Studio has been made much quicker and simpler to use when it comes to rendering by the addition of the Iray render engine. For many scenes, you will not need any additional lighting of any sort. Here is the same image rendered again after deleting the Spotlight, and it looks very good.

Let's create a New scene. Go to File->New. It will ask if you want to save your scene, decide whether you want it saved or not to continue.

In the Smart Content tab, double-click the 'Genesis 2 Female Starter Essentials'.

Once opened, search through to the 'Secret Garden Shaded Haven' as shown below. Then load the 'Vase' into the scene.

Genesis 2 Female Starter Essentials /
Default / Props / Architecture / Secret Garden Shaded Haven
When it shows up, it is a plain looking Vase. Let's add something to it.

Select the 'Vase' in your Scene tab.

In the Smart Content tab, we will search for the materials for props section. Load into the scene the '08 Vase MAT 05' with the Vase still selected in your scene.

Genesis 2 Female Starter Essentials /
Default / Materials / Secret Garden Shaded Haven / Default Mats / Props
Once you load in the new material, your vase now takes that material on its skin.

Delete the 'Vase' object from the scene, then go to the Fantasy SciFi section as shown below. Load the 'Genesis 2 Base Female' into the scene.

Genesis 2 Female Starter Essentials / Default / Figures / People / Female / Fantasy SciFi
With the Genesis 2 Female selected in the scene tab, find the Shirts section and load in the 'FullTop' wardrobe item.

Genesis 2 Female Starter Essentials / Default / Wardrobe / Shirts
Next load in the Pants wardrobe item from the Pants section.

Genesis 2 Female Starter Essentials / Default / Wardrobe / Pants
Once everything is loaded, your Genesis 2 Female figure will look like this.

Your Scene tab will look something similar to this.

Select the 'PersianFullTop' in the Scene tab.

Let's go back to the Smart Content and find the 'Romantic Top' material and load it into the scene.

Genesis 2 Female Starter Essentials / Default / Materials / Wardrobe
Next select the 'PersianPants' in the Scene tab.

Find the 'Romantic Pants' material, and load that into the scene.

Genesis 2 Female Starter Essentials / Default / Materials / Wardrobe
Once that's all done, your figure's clothes should now look green.

One last thing we need to do is change her eye color.

Select your 'Genesis 2 Female' in the Scene tab.

Find the Eye materials and load the 'Bree Eyes 03' into the scene.

Genesis 2 Female Starter Essentials / Default / Materials / Eyes
If done correctly, she will have much fiercer looking eyes.


Chapter 5: Content Library

To the right side of DAZ Studio screen, beneath the Scenes tab, you'll see the Content Library Tab. This area is similar to the Smart Content area that we've used during this tutorial, but it shows all the different products you can use in your scenes in a folder/file structure similar to how they are stored on your computer.

To find your products in the Content Library go to 'DAZ Studio Formats', then go to the 'My DAZ 3D Library'. Once there, you'll see an assortment of categories containing different products you have available.

To find such a product like the 'Genesis 2 Base Female' like we used in the previous chapter, we would go to the next category 'People'. When there, it will show us a variety of human figures you have downloaded and installed.

To find the 'Genesis 2 Base Female' we go to the next category 'Genesis 2 Female'. Here you can load the figure into the scene just like you could in the Smart Content section by double-clicking the thumbnail image or using the drag-and-drop method.

On the right side are the categories for the figure. You will see a variety of clothing, hair, materials, poses, props, etc that you can use for the specified figure.

You can also search through your Content Library for items. Just type what you are looking for in the search bar located at the top and hit enter or click the magnifying glass icon located to the right.

Once it starts searching, it will show a progress bar while it is working.

Once you've searched for something, or even while it's still searching, you are free to do other things in your Content Library. You can view the search results by clicking the Search entry shown at the bottom of the left-most column.

To get more familiar with using the Content Library, you can start this tutorial over using the Content Library to find and load items into your scene. Please note that when you are ready to perform any transformations (translate, rotate, scale), you will find the controls in the Parameters tab for any item selected in the Scene tab.

Conclusion
Now that you've learned how to create your own scenes by adding a variety of objects, changing materials, and rendering them, you are ready to expand your development following your own desires by utilizing the Starter Essentials bundles or even extending your abilities with the vast amount of products available to you.

Complete Scene using items from Starter Essentials